Showing posts with label a. Show all posts
Showing posts with label a. Show all posts
Monday, March 17, 2014
How to Find the Name or Title of a Song by Lyrics
Most people listen to songs from bands they like and sometimes search for the lyrics of a song if they can’t quite make out what’s being sung. However, for those of us who happen to listen to the lyrics of a song and want to find out who sang it, there are some useful lyric search engines that do just that. Frankly, this happen to me all the time!
Anyway, so if you know some of the lyrics for the song you’re looking for, you can try out a few of these lyric search engines to try and find the band or song name. Actually, there are quite a few of them out there, but only a few really have large databases of song lyrics. Here are some them websites :
1. Search Lyrics – This site also has some non-English lyrics and you can translate any of the English lyrics to another language on the lyric pages. Get Lyrical finds an exact match for your lyrics whereas Search Lyrics searches for those words anywhere in a particular song and will return a result even if the words are all not together.

3. LyricsFly – Make sure you click on Lyrics first and then perform a search.

The other web sites that I tried did not work good for song lyrics and so I’m not going to mention them here. If you know of any other lyric search engines, post a comment!
Anyway, so if you know some of the lyrics for the song you’re looking for, you can try out a few of these lyric search engines to try and find the band or song name. Actually, there are quite a few of them out there, but only a few really have large databases of song lyrics. Here are some them websites :
1. Search Lyrics – This site also has some non-English lyrics and you can translate any of the English lyrics to another language on the lyric pages. Get Lyrical finds an exact match for your lyrics whereas Search Lyrics searches for those words anywhere in a particular song and will return a result even if the words are all not together.
3. LyricsFly – Make sure you click on Lyrics first and then perform a search.
The other web sites that I tried did not work good for song lyrics and so I’m not going to mention them here. If you know of any other lyric search engines, post a comment!

Monday, October 14, 2013
iPhone Tools v1 1 A Free iPhone Software Tool Pc
iPhone Tools


Download
.Net Framework 4
t Framework 4 Is Required. Otherwise Software May Gives
Screenshot:
Features:
Change Log:
V:1.1
-Registration in a easy way(Standalone/Free)
-Some bugs fixed
- Carrier Checker
- Bulk Carrier Check
- IMEI Validation Offline
- IMEI Validation Online
- Apple Support And Service Checker
- Serial Checker
- iPhone Factory Unlocking Service
- Some Other Tools
Change Log:
V:1.1
-Registration in a easy way(Standalone/Free)
-Some bugs fixed
Download
.Net Framework 4
t Framework 4 Is Required. Otherwise Software May Gives
Tuesday, October 8, 2013
Want A Cheap Unlocked iPhone 5 Choose Verizon
The iPhone 5 as apple says is the most powerful smartphone ever and the best thing to have happened to the iPhone since it came out in 2007, With record selling and highly recommended by reviewers you might be thinking of getting one. Well if you are thinking to get an iPhone 5 on contract, Verizon is the best carrier you can buy with, yes the largest Wireless network across united states is providing the iPhone 5 in just 199$ and that too Unlocked.
The Verizon’s iPhone 5 comes out as unlocked from the box, and you can use it with other CDMA and GSM networks including its rival AT&T. Well after reading reading this, the first thing which will hit your mind is that why is Verizon being so nice to us all of a sudden? Maybe they’ll lock it later? Well to avoid that confusion, Verizon themselves have issued an official statement today that they will let their users switch to other carriers, and they are not gonna lock it again ever.

This is for the first time ever that Verizon is letting their iPhone users switch to other network without any unlock, and give an unlock iPhone 5 for the same price. The reason behind it is FCC, yes an order issued by FCC for using the 700 MHz spectrum which is being used in the iPhone 5 having LTE. So they don’t have any choice, either they sell it without locking it or they stop making the iPhone 5.
So folks, if you are thinking of buying the iPhone 5, Verizon should be the first and last choice to you, because in just 199$ you get an unlocked iPhone 5 with 4G LTE.
NEW YORK (AP) — Verizon Wireless said Monday that it wont prevent its version of the iPhone 5 from being used on AT&Ts network.
The Verizon version of the iPhone 5, which went on sale Friday, came with an unexpected feature: it works on the network of AT&T and many other phone companies, as well as on Verizons.
Its the first time Verizon, the countrys largest cellphone company, has sold a phone that works on competing U.S. networks with no complicated hacking, or "unlocking," procedures.
Last year, the first shipments of the Sprint iPhone 4S were unlocked and worked on AT&T, but Sprint later issued software updates that turned off that capability.
Verizon Wireless spokeswoman Brenda Raney said Monday that Verizon does not plan to relock the iPhone 5.
Verizon and Sprint do "unlock" other phones on request, but only for use on non-U.S. networks. They do so to let travelers save money by using local SIM cards and accounts when overseas.
The Verizon’s iPhone 5 comes out as unlocked from the box, and you can use it with other CDMA and GSM networks including its rival AT&T. Well after reading reading this, the first thing which will hit your mind is that why is Verizon being so nice to us all of a sudden? Maybe they’ll lock it later? Well to avoid that confusion, Verizon themselves have issued an official statement today that they will let their users switch to other carriers, and they are not gonna lock it again ever.
This is for the first time ever that Verizon is letting their iPhone users switch to other network without any unlock, and give an unlock iPhone 5 for the same price. The reason behind it is FCC, yes an order issued by FCC for using the 700 MHz spectrum which is being used in the iPhone 5 having LTE. So they don’t have any choice, either they sell it without locking it or they stop making the iPhone 5.
So folks, if you are thinking of buying the iPhone 5, Verizon should be the first and last choice to you, because in just 199$ you get an unlocked iPhone 5 with 4G LTE.
So about the contract???
NEW YORK (AP) — Verizon Wireless said Monday that it wont prevent its version of the iPhone 5 from being used on AT&Ts network.
The Verizon version of the iPhone 5, which went on sale Friday, came with an unexpected feature: it works on the network of AT&T and many other phone companies, as well as on Verizons.
Its the first time Verizon, the countrys largest cellphone company, has sold a phone that works on competing U.S. networks with no complicated hacking, or "unlocking," procedures.
Last year, the first shipments of the Sprint iPhone 4S were unlocked and worked on AT&T, but Sprint later issued software updates that turned off that capability.
Verizon Wireless spokeswoman Brenda Raney said Monday that Verizon does not plan to relock the iPhone 5.
The feature may mean little initially to most buyers, since they sign up for two years of Verizon service when buying the phone. But it does give them the option to switch carriers when the contract expires, or they can sell the phone to someone who plans to use it on a competing network. They also have the option of breaking the contract, paying an early termination fee, and signing up for cheaper service —the Verizon iPhone 5 even works on prepaid service plans.
Verizon and Sprint do "unlock" other phones on request, but only for use on non-U.S. networks. They do so to let travelers save money by using local SIM cards and accounts when overseas.
Friday, October 4, 2013
Trick How to Display or Hide a Widget In Blog

Trick How to Display or Hide a Widget In Blog - You have a lot of widgets that appear on your blog? Blog widget that too many of course will reduce the speed of loading of our own blog. However, if the widget it was important for you and still wants to maintain its existence it helps you do the settings on any page you want to show the blog. A widget for example, will you show it only on Homepage orvice versa. You also can display a widget only on specific URLs.
1. How do I show only widgets only on Homepage
=> Place the widget code between the following code
<b:if cond=data:blog.url == data:blog.homepageUrl>
Advertise YOUR CODE HERE
</ B: if>
2. How do I hide a widget from our Homepage
=> Place the widget code between the following code
<b:if cond=data:blog.pageType == "item">
Advertise YOUR CODE HERE
</ B: if>
3. How do I show widgets only on pages Static Page
=> Place the widget code between the following code
<b:if cond=data:blog.pageType == "static_page">
Advertise YOUR CODE HERE
</ B: if>
4. How do I hide the widget from the page Static Page
=> Place the widget code between the following code
<b:if cond=data:blog.pageType != "static_page">
Advertise YOUR CODE HERE
</ B: if>
5. How to display the widget only on specific URLs
=> Place the widget code between the following code
<b:if cond=data:blog.url Your Choice == "URL disini">
Advertise YOUR CODE HERE
</ B: if>
6. How do I hide certain widgets from the URL
=> Place the widget code between the following code
<b:if cond=data:blog.url != disini"> "URL Your Choice
Advertise YOUR CODE HERE
</ B: if>
So how do I show or hide the default widget from blogger yourself? such as About me, Archive, Label and so forth.
Usually the blogger default code will look like this
<b:widget id=HTML locked=false title=JUDUL WIDGET ANDA type=Profile>
<b:includable id=main>
WIDGET CODE DEFAULT YOUR BLOGGER
</ B: includable>
</ B: widget>
To control this widget you just need to insert control codes according to what you want.Suppose you want to show widgets only on Homepage only, then put the code on the No. 1 above as below
<b:widget id=HTML locked=false title=JUDUL WIDGET ANDA type=Profile>
<b:includable id=main>
<b:if cond=data:blog.url == data:blog.homepageUrl>
YOUR WIDGET CODE
</ B: if>
</ B: includable> </ b: widget>
Tuesday, October 1, 2013
Install Windows 8 From A USB Stick Guide
We recently reported that Microsoft has released Windows 8 Developer preview edition and it’s available for every one. People over Technobolt has prepared this guide on how to install Windows 8 From A USB Stick.
First You Will Need:Here is how to make a Windows 8 Bootable USB Stick:
- Windows 8 ISO - Developer Preview [Download]
- Windows 7 USB/DVD [Download] – This is the official Microsoft tool for creating bootable DVD or USB device of Windows 8
Step 1: Install Window 7 USB/DVD tool and open it, Browse the Windows 8 ISO which you downloaded earlier and click next.We didn’t try this yet, so feed us back and tell us what do you think of Windows 8.
Step 2: In the second step select USB in creating bootable image.
Step 3: Plug in USB and browse the USB as shown in picture below to create bootable Windows 8 drive, now click begin copying:
Step 4: That’s it Windows 8 files will now be copy to usb in the form of bootable image.
Step 5: Now simply restart your computer and boot the computer via USB drive to begin installation of Windows 8.


Last edited by ednacell; Today at 02:10 PM.
Monday, September 30, 2013
This Is How You Start A Tech Business
This Is How You Start A Tech Business - In this globalization era, you have to smart in deciding the important step for your future. What does it mean? As you have known, nowadays having a business is considered as the main thing for every people. By building your own business, you will know whether you able to get much money or not. You have also noticed that technology always increases all the time. Why you do not try to start tech business? Well, many people still confuse when they want to start this business. But you do not need to worry about that. Here, you�ll find the best solution for doing this business.
One thing you have to remember is you do not have to a genius or smart people for starting tech business. Solution Union really knows how to help you to start your business. You do not need to worry about anything. Solution Union gives Private Label for your business, so you�ll have your own brand. If you need the service for your White Label, Solution Union can help you with that. The most important thing, you will get the trust from your customers.
Solution Union is really the pioneer for those who want to start their SaaS business. There is no worry about that if you trust Solution Union for helping your business.
Friday, September 27, 2013
A Proxy Server For Siri Hack Without Jailbreak and tools
Hacker Creates A Proxy Server For Siri
Few days back, hacker at Applidlium had managed to crack Siri is security protocol that made Siri limited for iPhone 4S only. A hacker today created a proxy server for iPhone 4S’ Siri which named Siri Proxy.
Applidium hack says that idea behind the proxy server is to make it easy for developers to add unlimited functionality to Siri. He released the source code of the created Siri Proxy with the instructions on how to set it up on the well known social coding site – GitHub.
Moreover, the hacker has also demonstrated how the created proxy server works by crating a plugin to control a Wi-Fi thermostat, commands such as “What is the status of the thermostat?” or “Set the thermostat to 68 degrees”, or even “What’s the inside temperature?”.
Hack Without Jailbreak
He mentioned that this wont let you get Siri on other device, it just for you to add your own functions to Siri.
Quote:
I’m the creator of this particular hack, and I can assure you, it doesn’t require the iPhone to be jailbroken. My iPhone 4S is not jailbroken. The only action I needed to take on my iPhone was to install my fake Root CA. Which you can do without jailbreaking. Everything else is done outside of the phone, so it requires no jailbreaking or code to be placed on the phone itself.
Tools here.
https://github.com/plamoni/SiriProxy

Saturday, September 14, 2013
An Easy Way to Make a Bootable USB Drive with Rufus

An Easy Way to Make a Bootable USB Drive with Rufus - Not infrequently some of us are faced with obstacles that require the computer booting from a USB flash drive (flash). For example, should re-install windows, Linux, update the BIOS, Recovery password or to just check and analyze the operating system. One free and portable software that we can use is Rufus.
Previously Ive had to review a variety of free software to create a bootable Windows (see 5 Software Free make Bootable USB Windows). Now there is another free software and other portable that is no less good, which is Rufus. Even the software is not just for windows installation alone but more than that.
Rufus is a small, lightweight utility that can be used to format and create a bootable USBFlash drive (flash, memory stick, etc.). By Rufus we can use for various things, such as:
- Want to install the operating system of either Windows or Linux USB
- Want to work with devices such as hard drive no operating system is its
- To flash the BIOS or firmware update from DOS
- To run software that requires access to low level, such as low-level format
Some Advantages of Rufus
Although previously I cover a variety of software to create a bootable USB, but some onlyfor Windows and some are also limited to Windows Vista / 7 only. Another case with Rufus, despite its small size, Rufus has several advantages, including:
- The process of creating a bootable USB relatively quickly (even compared to softwarelike UNetbootin to create a bootable Windows 7 is almost 2 times faster)
- There are options that include a FreeDOS, so useful for example to upgrade the BIOS or DOS utility other
- Size is very small (only 146 KB and 407 KB without FreeDOS with FreeDOS) andportable (no install)
- The existence of the feature to check the existence of "bad blocks"
- Can be used to create a bootable USB variety of operating systems (Windows and Linux) and recovery utility. Learn to see the description below
Various systems are supported Rufus enough of them: Arch Linux, Archbang,CentOS, Damn Small Linux, Fedora, FreeDOS, Gentoo, gNewSense, Hiren�s Boot CD, Knoppix, Kubuntu, NT Password Registry Editor, OpenSUSE, Slackware, Tails,Ubuntu, Ultimate Boot CD, Windows 7, Windows 8 Developer Preview, Windows Vista, and others.
Use
Use of this software is very easy, after the USB is attached, run Rufus. It will appear as it does when going to format in Windows, with some additional features, such as USBFlash drive information, file system, cluster size selection, Create a new label, check the bad block, quick format, add your own label and icon and the file selection ISO.

When creating a bootable USB, there is the option to make bootable MS-DOS, FreeDOS, or from an ISO Image file. Where do we get the ISO file? To get the ISO file that contains the operating system, we can make it from the CD / DVD windows, Linux or otherwise using such software ImageBurn.
After setting the selection is complete, we just click the Start button to begin creating a bootable USB flash drive and wait until the process is complete.
Tuesday, September 10, 2013
How To Install Windows 8 In A Virtual Machine at your Mac

Microsoft has been showing if its upcoming Windows 8 operating system at its BUILD conference in California this week, and while I may be completely dedicated to my Mac, I can’t help but think Windows 8 looks pretty darn nice.
We’ve already showed you how to install the Developer Preview on a Boot Camp partition on your Mac, but there is an easier method for those of you who just want to play around. In this how-to, we’ll take you through the setup for installing Windows 8 in a virtual machine — in just four simple steps.

Step 1: Download Windows 8 Developer Preview
The first thing you’ll need, if you haven’t already got it, is the Windows 8 Developer Preview build.You can download this from dev.windows.com. You’ll have a choice between the 32-bit and 64-bit builds. I recommend you go for the former — it’s just 2.9GB as opposed to 3.6GB, and it’s all you’ll really need to play around with.

The Windows 8 download will be a .iso file, and will likely be saved to your ‘Downloads’ folder. However, be sure to keep a note of its location — you’ll need this in step 3.

Step 2: Download VMware Fusion 4.0
Once you have your Windows 8 Developer Preview, you’ll need an application to run the virtual machine. We’re going to use VMware Fusion for this for two reasons: Firstly, it’s the easiest to set up, and secondly, if you don’t already have it you can download a free 30-day trial.VMware Fusion 4.0 launched just last week, and is completely compatible with OS X Lion. Once you’ve downloaded the application, install it on your Mac.

Step 3: Setup Your Windows 8 Virtual Machine
So, now you have your Windows 8 download and you’ve installed VMware Fusion 4. Open up VMware Fusion and choose to create a new virtual machine. Click the ‘Continue without disc’, and then ‘Choose a disk or disk image…’.
Step 4: Locate Your Windows 8 Download & Install
Navigate to your Windows 8 Developer Preview .iso file and click ‘Next’. VMware will now ask you to choose your operating system. Windows 8 will not be available, so just select Microsoft Windows 7 instead. Click ‘Continue’ and then click ‘Finish’ in the next window.
Now wait while VMware Fusion performs its magic and sets up your Windows 8 partition. This shouldn’t take too long, but it will depend on the speed of your Mac.

Your Windows 8 virtual machine will now be set up and ready for you to play around with. Enjoy!
Sunday, September 1, 2013
Installing a Portable Applications For Your NetBook
Installing a Portable Applications For Your NetBook - In general, the installation software on Laptops, Computers, Tablet or Netbook same. Butfor most applications with a paid license you must enter a code - code that the application is running smoothly. As for the Software obtained for free, in general you do not have to.
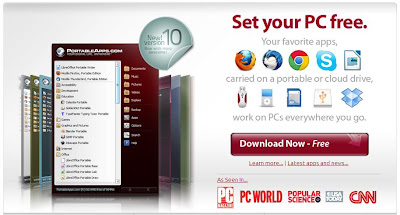
Installation caused the same way, so this time the author is trying to share in the actual application for Netbook specialize. Due to its lightweight size so it will not meet theburden of memory and disk space. As we know that the Netbook itself is not designedfor proper usage of the application of his Laptop / Notebook.
If you want to use it, its steps are as follows:
- Open your favorite browser, point it to http://portableapps.com/
- Click Download Now.
- After that you will be confronted to three download options menu to suit your needs. In this article the authors use the application to the type of 12 MB ??/ 14 MB Installed.
- Let the moment, the moment it would come out automatically file for download. Leave to file in the Download is complete.
- Once it has finished downloading, double click on his or her application.
- Click Next to begin the installation.
- Accept the terms that appear by clicking I Agree.
- Next specify the folder where the installation, because the specialize for Netbook users,the authors suggest to put it on Flash Disk. In the example this time the author put his data in Drive D in the hard disk. Later the same way if you put it in the Flash Disk. Continue by clicking Install.
- Allow the installation process is running.
- After the installation is complete, give a check in the launch and then click finish PortableApps.com Platform.
- Will automatically exit the application icon in your taskbar. At first glance the menuinterface is similar to the Start Menu of Windows Vista.
- click menu All Portable Apps to start to install the application is needed.


For now if the application is already installed on your netbook, then you no longer need to install many applications such as Office or any Browser. Due to the PortableApps application has summarized it all into one portable package in the Flash Disk.
So where you need it later application, you simply stay bring your Flash Disk for use in other netbooks.
Any Tricks article thats on Installing a Portable Applications For Your NetBook, may help you. Thank you for your visit, we may learn useful computer online.
Any Tricks article thats on Installing a Portable Applications For Your NetBook, may help you. Thank you for your visit, we may learn useful computer online.
Saturday, August 31, 2013
How to Fix a Computer Power Supply Damaged

How to Fix a Computer Power Supply Damaged - Power supply is an important part of the computer. Power supply has a function to provide power to all computer equipment. Power supply is like a food basket for all workers in the computer. Without the power supply, as high as any specification of your computer will not mean anything. Power supply is the lifeblood of your computer, if is damaged, then the stability of uninterrupted computer access, even you will not be able to operate a computer at all.
If you suspect that your power supply is dying, replace it. A common clue which indicates a failing power supply is a high-pitched whining or grinding noise from the area of the case where the power supply is housed. Dont wait until the supply dies, because its failure can cause voltage problems which can ruin your motherboard, hard drive, or other components.
Invest in a high quality power supply. Do some research before you purchase one. More wattage on the package doesnt mean better. Most home PCs dont actually use more than 300W, even though this is not what power supply marketing people want you to know. The unit should provide adequate wattage for your needs. Dont skimp on the power supply, as you may regret it later. Power supplies that fail can damage other components in your computer, especially the motherboard.
Power supply has an important task to change the power supply from high voltage to low voltage consumed by the computer. As we know that the voltage is different in each country, by the power supply was changed to 12 V and 5 V. Furthermore not only lowers power supply voltage, but also a change from the current-voltage AC (Alternating) to a voltage DC (Unidirectional), because the computer does not consume alternating voltage.
Function of power supply will be disrupted if damaged. The preparation How to Fix a Computer Power Supply Damaged are as follows:
- Prepare standard equipment to improve power supply is a screwdriver, pliers, and AVO meter.
- Open the casing cover power supply using a screwdriver.
- Measure the input voltage of your electrical outlet is 220 V showed a normal number? If there is zero chance powernya broken wires, replace the cable. Or if the numbers do not mean there are up to 220 V voltage drop, check your stabilizers or electrical conditions in your area.
- Measure out from the power supply voltage is correct about 12 V and 5 V? If not check the power supply components in the electrolyte condenser.
- Be careful during the analysis of damage, because youre working with power tools.
Any Tricks article thats on How to Fix a Computer Power Supply Damaged, may help you. Thank you for your visit, we may learn useful computer online.
Subscribe to:
Posts (Atom)