Showing posts with label fix. Show all posts
Showing posts with label fix. Show all posts
Saturday, September 28, 2013
Jailbreak 5 1 1 Untethered with Absinthe 2 0 1 fix Absinthe Lockdown Error

The main errors that pop up seem to be “Error detecting device (lockdown error -5)” and “Could not connect to lockdown“…
We’ve been in contact with @pod2g and @pimskeks, and they confirmed the problem is a random coincidence that creates a timeout. But the fix is fairly easy. All you have to do is go to Settings > General > Reset > Reset All Content and Settings. Then make sure you download Absinthe 2.0.1 and run it again.
Absinthe 5.1.1 Untethered Jailbreak - Supported Devices:
- iPhone 3Gs
- iPhone 4
- iPhone 4 CDMA
- iPhone 4S
- iPad 1
- iPad 2 Wifi
- iPad 2 GSM
- iPad 2 CDMA
- iPad 2 Wifi, R2
- iPad 3 Wifi
- iPad 3 Global
- iPad 3 CDMA
- iPod 3G
- iPod 4G
- AppleTV 2

Tuesday, September 24, 2013
Fix iTunes Error 1013 When Updating iPhone 4 to iOS 4 2 1 or 4 3 1
If you have tried updating to the recently released iOS 4.3.1 update on iPhone 4 and encountered Error Code 1013 or Error Code 1611,then you are a not alone. This has been a common issue across all iOS devices updating to iOS 4.3.1 and Apple Support Discussion forums are full of users complaining about this issue.

This bug has apparently been reported to Apple but if you don’t fancy waiting for an official fix, you can follow this guide to try and successfully update your iOS device to 4.3.1. Before doing so, you may also like to try and restore using a different computer.
Warning Note: This will result in your iPhone 4 baseband being upgraded to the latest version.
How to Fix Error Code 1013:
Mac OS X:
Step 1. On your Mac, go to your “Applications” folder.
Step 2. Now navigate to the “Utilities” folder.
Step 3. Launch "Terminal".
Step 4. Type "sudo nano /etc/hosts" (without quotes) and hit return.
Step 5. Enter your password
Step 6. Use the down arrow key to find the “gs.apple.com” entries. Once the cursor is in front, make sure you comment out the line(s) by entering “#” in front of the text.
Step 7. Save the file by pressing CONTROL+O.
Step 8. Exit the nano editor by pressing CONTROL+X.
Step 9. Restore your iDevice.
Windows:
Step 1. Start –> Programs –> Accessories
Step 2. Run Notepad or WordPad
Step 3. Click “Open..” from File menu.
Step 4. Browse to Windows/System32/drivers/etc
Step 5. In "files of type:" select all documents
Step 6. Open "hosts"
Step 7. Delete all line that has "gs.apple.com" or something like that
Step 8. Hit Save
Read More..
This bug has apparently been reported to Apple but if you don’t fancy waiting for an official fix, you can follow this guide to try and successfully update your iOS device to 4.3.1. Before doing so, you may also like to try and restore using a different computer.
Warning Note: This will result in your iPhone 4 baseband being upgraded to the latest version.
How to Fix Error Code 1013:
Mac OS X:
Step 1. On your Mac, go to your “Applications” folder.
Step 2. Now navigate to the “Utilities” folder.
Step 3. Launch "Terminal".
Step 4. Type "sudo nano /etc/hosts" (without quotes) and hit return.
Step 5. Enter your password
Step 6. Use the down arrow key to find the “gs.apple.com” entries. Once the cursor is in front, make sure you comment out the line(s) by entering “#” in front of the text.
Step 7. Save the file by pressing CONTROL+O.
Step 8. Exit the nano editor by pressing CONTROL+X.
Step 9. Restore your iDevice.
Windows:
Step 1. Start –> Programs –> Accessories
Step 2. Run Notepad or WordPad
Step 3. Click “Open..” from File menu.
Step 4. Browse to Windows/System32/drivers/etc
Step 5. In "files of type:" select all documents
Step 6. Open "hosts"
Step 7. Delete all line that has "gs.apple.com" or something like that
Step 8. Hit Save
Thursday, September 19, 2013
How To Fix iTunes Error 9808
In this article we will introduce iTunes error (–9809) which is an error message happens when you try to connect to iTunes store.You may receive the alert message "We could not complete your iTunes Store request. An unknown error occured (-9808) when you try to connect to iTunes. There was an error in the iTunes Store. Please try again later." , we will help you to solve this issue .

Step 1 : set the correct date and time :
On Windows:
1-choose Start > Control Panel.
2-choose "Date, Time, Language, and Regional Options" > click Date and Time.
3-Click the Date & Time tab.
4-choose the correct date and time then click ok.
On Mac OS X:
1-From theApple () menu, click System Preferences.
2-From System Preferences, click Date & Time.
3-Activate the option of "Set date and time automatically" if it is not.
4-Click the Time Zone tab and adjust the correct time zone of your location.
Step 2 : Adjust your certificate settings :
On Windows:
1-Click the Start menu > Control Panel.
2-Choose Internet Options.
Note: You have to change to Classic View on the left before you can see Internet Options If you are using Windows Vista .
Note: You have to change "View by" to either Large icons or Small icons before you can see Internet Options If you are using Windows 7 .
3-Click the Advanced tab.
4-Scroll down to the Security section in the settings box.

5-Uncheck the box "Check for server certificate revocation (requires restart)."
6-choose the options for "SSL 3.0" and "TLS 1.0."
7-Click ok and restart your computer.
On Mac OS X:
1-Click the Go menu > Finder > Utilities.
2-Select Keychain Access.
3-Click the Keychain Access menu > Preferences.
4-Click on the Certificates tab.
5-Choose Off under Online Certificate Status Protocol (OCSP)
6-Choose Off under Certificate Revocation List (CRL).
7-Restart your Mac.
Step 1 : set the correct date and time :
On Windows:
1-choose Start > Control Panel.
2-choose "Date, Time, Language, and Regional Options" > click Date and Time.
3-Click the Date & Time tab.
4-choose the correct date and time then click ok.
On Mac OS X:
1-From theApple () menu, click System Preferences.
2-From System Preferences, click Date & Time.
3-Activate the option of "Set date and time automatically" if it is not.
4-Click the Time Zone tab and adjust the correct time zone of your location.
Step 2 : Adjust your certificate settings :
On Windows:
1-Click the Start menu > Control Panel.
2-Choose Internet Options.
Note: You have to change to Classic View on the left before you can see Internet Options If you are using Windows Vista .
Note: You have to change "View by" to either Large icons or Small icons before you can see Internet Options If you are using Windows 7 .
3-Click the Advanced tab.
4-Scroll down to the Security section in the settings box.
5-Uncheck the box "Check for server certificate revocation (requires restart)."
6-choose the options for "SSL 3.0" and "TLS 1.0."
7-Click ok and restart your computer.
On Mac OS X:
1-Click the Go menu > Finder > Utilities.
2-Select Keychain Access.
3-Click the Keychain Access menu > Preferences.
4-Click on the Certificates tab.
5-Choose Off under Online Certificate Status Protocol (OCSP)
6-Choose Off under Certificate Revocation List (CRL).
7-Restart your Mac.
How to Fix iOS 5 Firmware Restore Error 3002 1604 1600
Step 1: Install newest version of iTunes while do not connect your iPhone, iPod or iPad yet.
Step 2: Once installed, run new iTunes for a while then close it.
Step 3: Windows users simply go to folder C:Documents and SettingsApplication DataApple ComputeriTunesiPhone Software Updates. Mac users need to locate it. I don t really sure where it is.
Step 4: Cut and paste files there to somewhere else.
Do not delete them in case the steps does not work for you, you can still copy them back to the folder. You can find out your username by pressing Ctrl+Alt+Del. Step 5: Put your iPhone into DFU Mode
Step 6: Finally, proceed with iOS 5 restore procedure.
Actually there is another way to fix the error on Windows 64-bit using custom iOS 5 .ipsw created with Sn0wBreeze:
Step 1: Go to C:UsersuserAppDataRoamingAppleComputeriTunesDevice
Step 2: Cut and paste files and paste them somewhere else
Step 3: Take the recently .IPSW file created with snowbreeze and paste it on this folder and rename it to "x12220000_5_Recovery.ipsw".
Step 4: Then, go back to itunes
Step 5: Enter DFU mode >> restore >> hold [Shift] to restore >> select the file on the folder C:UsersuserAppDataRoamingAppleComputeriTunesDevice and it will work out.
If you are still bothered by the same issues, try the 2 ways above, hope it is helpful. If you want to know how to install and jailbreak the iOS 5 beta version, you can refer to the previous articles. Please stay tuned.

Monday, September 16, 2013
Resn0w 0 9 6rc16 Fix Side Switch and Vibration Problems iPhone 4 3GS after 4 3 3
Musclenerd of iPhone dev-team has just release RedsnOw 0.9.6rc16 for Windows and Mac specially to fix iPhone 3GS and iPhone 4 side switch and vibration issue. Download Redsn0w 0.9.6rc16 for WindowsPwnageTool and redsn0w have been updated to include a fix for the iPhone3GS/i4 side switch vibration issue. Thanks to @i0n1c for tracking this down (even though he doesn’t even have an iPhone!).
If you’re already jailbroken at 4.3.3 (by either redsn0w or custom IPSW), you can install this fix simply by running redsn0w rc16 over your existing jailbreak. Just uncheck the “Install Cydia” option and check any other options you want. The fix will be installed no matter what you’ve selected. This is safe for even ultrasn0w unlockers to do (because redsn0w itself won’t update your baseband…only an iTunes stock IPSW update/restore will do that).
redsn0w rc16 has a few more improvements: Windows 7 and Vista users should no longer need to set their CPU affinity…just run redsn0w as Administrator in XP compatiblity mode. Also, the “verbose boot” option for old-bootrom iPhone 3GS has been fixed for 4.3.3 (remember: old-bootrom 3GS users can even have custom bootlogos that show right at power-up). Enjoy!
Download Redsn0w 0.9.6rc16 for Mac
Friday, September 13, 2013
Apple Drops iOS 4 3 4 To Fix JailbreakMe Jailbreakers And Unlockers Do Not Update
Just a quick heads-up: Apple jsut dropped iOS 4.3.4. Nothing new in this update, except for Apple patching the JailbreakMe exploit. Jailbreakers and especially unlockers stay away from this update and save your 4.3.3 blobs NOW ( using TinyUmbrella ).
Products compatible with this software update:
- iPhone 4 (GSM model)
- iPhone 3GS
- iPad 2
- iPad
- iPod touch (4th generation)
- iPod touch (3rd generation)

Wednesday, September 11, 2013
How to Fix iPhone 4 iOS 4 3 Battery Drain
As I reported you yesterday about the problem which faced some problems with battery life after upgrading to iOS 4.3, our reader has sent a new method to stop the battery drain.
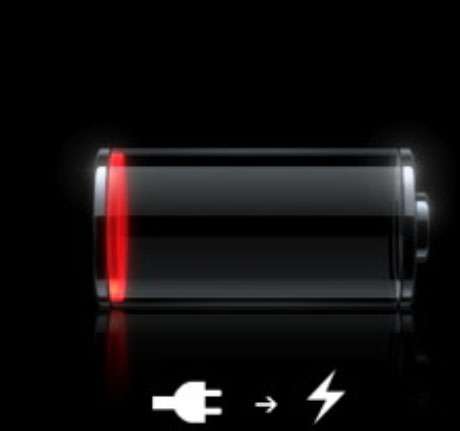
First method to stop iOS 4.3 Battery life problem:
Battery life should be restored to what they were before the latest update. Precisely, its the notification system in Ping.
Go to Settings > General > Restrictions and select Enable Restrictions. You will see Ping setting whereby you can click on the switch to disable it. This will save 2 hours for your iOS device
Second method to stop iOS 4.3 Battery life problem (use if the first method didnt solve your problem):
Go to Setting > General > Reset > Reset Network Settings.
Read More..
First method to stop iOS 4.3 Battery life problem:
Battery life should be restored to what they were before the latest update. Precisely, its the notification system in Ping.
Go to Settings > General > Restrictions and select Enable Restrictions. You will see Ping setting whereby you can click on the switch to disable it. This will save 2 hours for your iOS device
Second method to stop iOS 4.3 Battery life problem (use if the first method didnt solve your problem):
Go to Setting > General > Reset > Reset Network Settings.
Tuesday, September 10, 2013
How To Fix iPhone iPad iPod Touch Wi Fi Connectivity Issue After Upgrading To iOS 5
Few days back Engadget reported that some users were facing Wi-Fi connectivity issues after upgrading to iOS 5 or iOS 5.0.1. Based on this discussion thread, it seems to be affecting iPhone 4S, iPhone 4S, iPhone 3GS, the iPads and even iPod touch users.
This is not the first time iOS device users are facing Wi-Fi connectivity issues after upgrading to the latest iOS 5/iOS 5.0.1 software update. Users have reported similar issues with Wi-Fi connectivity after upgrading to iOS 3.x and iOS 4.x software update as well. If you’re facing any of these issues, you can follow these tips to see if one of them resolves the issue until Apple releases an iOS software update to fix the issue:
Basic Troubleshooting:Renew IP Address: If this doesnt work then try to renew IP address, which may be required if you are using a larger wireless network.
- Launch Settings app
- Tap Wi-Fi
- Turn Wi-Fi toggle off and then on again
Forget This Network: If renewing IP address doesn’t resolve the issue, try establishing a fresh connection with the Wi-Fi network by using the Forget This Network option. Please note that this will clear your current Wi-Fi network settings, including saved Wi-Fi passwords.
- Launch Settings app
- Tap on the Wi-Fi network that you connect to from the list
- Scroll down and tap on the Renew Lease button
If this doesn’t help try restarting your iOS device. Restart iOS Device:
- Launch Settings app
- Tap on the Wi-Fi network that you connect to from the list
- Tap on the Forget This Network button
- You will be prompted with a message that your iOS device will stop automatically joining this network. Tap on the Forget button.
- Go back to the list of Wi-Fi networks, try to locate and join the Wi-Fi network again.
Reset Network Settings: If restarting your iOS device doesn’t resolve the problem then reset all network settings. Please note that this will clear your current cellular and Wi-Fi network settings, including saved networks, Wi-Fi passwords, and VPN settings.
- Press and hold the Sleep/Wake button until "slide to power off" slider appears. Slide your finger across the slider and iOS device will turn off after a few moments.
- Turn iOS device on by pressing and holding the Sleep/Wake button until the Apple logo appears.
- Launch Settings app
- Tap General
- Scroll to the bottom of the screen and tap on Reset
- Tap Reset Network Settings
- When the device restarts, try to locate and join the Wi-Fi network again.
Please let us know if you’re facing any Wi-Fi connectivity issue after upgrading to iOS 5 or iOS 5.0.1 and if any of the tips mentioned above helped in resolving the issue.
Saturday, August 31, 2013
How to Fix a Computer Power Supply Damaged

How to Fix a Computer Power Supply Damaged - Power supply is an important part of the computer. Power supply has a function to provide power to all computer equipment. Power supply is like a food basket for all workers in the computer. Without the power supply, as high as any specification of your computer will not mean anything. Power supply is the lifeblood of your computer, if is damaged, then the stability of uninterrupted computer access, even you will not be able to operate a computer at all.
If you suspect that your power supply is dying, replace it. A common clue which indicates a failing power supply is a high-pitched whining or grinding noise from the area of the case where the power supply is housed. Dont wait until the supply dies, because its failure can cause voltage problems which can ruin your motherboard, hard drive, or other components.
Invest in a high quality power supply. Do some research before you purchase one. More wattage on the package doesnt mean better. Most home PCs dont actually use more than 300W, even though this is not what power supply marketing people want you to know. The unit should provide adequate wattage for your needs. Dont skimp on the power supply, as you may regret it later. Power supplies that fail can damage other components in your computer, especially the motherboard.
Power supply has an important task to change the power supply from high voltage to low voltage consumed by the computer. As we know that the voltage is different in each country, by the power supply was changed to 12 V and 5 V. Furthermore not only lowers power supply voltage, but also a change from the current-voltage AC (Alternating) to a voltage DC (Unidirectional), because the computer does not consume alternating voltage.
Function of power supply will be disrupted if damaged. The preparation How to Fix a Computer Power Supply Damaged are as follows:
- Prepare standard equipment to improve power supply is a screwdriver, pliers, and AVO meter.
- Open the casing cover power supply using a screwdriver.
- Measure the input voltage of your electrical outlet is 220 V showed a normal number? If there is zero chance powernya broken wires, replace the cable. Or if the numbers do not mean there are up to 220 V voltage drop, check your stabilizers or electrical conditions in your area.
- Measure out from the power supply voltage is correct about 12 V and 5 V? If not check the power supply components in the electrolyte condenser.
- Be careful during the analysis of damage, because youre working with power tools.
Any Tricks article thats on How to Fix a Computer Power Supply Damaged, may help you. Thank you for your visit, we may learn useful computer online.
Subscribe to:
Posts (Atom)