Showing posts with label using. Show all posts
Showing posts with label using. Show all posts
Friday, March 21, 2014
Download Torrent Files Without Using Torrent Client
Just follow the given steps-
- First Download and Install IDM (Internet download Manager).
- Now Copy Any Torrent link Address or Download the Torrent File.
- Now Visit site zbigz.com .
- Paste the Link Address or Upload the Torrent File.
- Now Click on Go Free .
Youve done!!
Now the site where you have Uploaded the Torrent File will download the whole torrent stuff and will give you the direct link and if got IDM, then the download will automatically start in IDM with Maximum Speed.
IDM will download the whole file in once and there will be no Parts like in Hotfile or Rapidshare etc .It will also give Resume Capability, so that you can pause at anytime.

Friday, March 14, 2014
Create your own Shortcut using Run Command on Windows
If you are using some programs very frequently, Then here is trick you can create your own Run command to make your program to start faster.
You need to follow some simple steps to create your own shortcut command :
- Open the Run dialog from Start menu or use shortcut command Win+R
- Enter %windir% to open windows directory
- Now enter ALT +F to open file menu, then Press W and then S
- You will see a new pop up window to create shorcut
- Browse the desired program , and go through the wizard to create the shortcut to the desired program (Eg - Browse a program mozilla firefox and give a shorcut name mf)
- To start program, Type the name you give shortcut in Run Dialog (Eg - Type mf in Run dialog, mozilla firefox will open)
So Enter Window+R for Run dialog , and type shortcut name , its done ...
Monday, October 14, 2013
How to Jailbreak Your iPod Touch 4G Using RedSn0w Mac 5 0b4
These are instructions on how to jailbreak your iPod touch 4G on the 5.0b4 firmware using RedSn0w for Mac. Since iOS 5.0 has not yet been released these are instructions for developers only. This procedure will not hacktivate so you must have your UDID registered with a developer, and as of now the jailbreak is tethered.
Step One
Create a folder on your desktop called Pwnage
Download RedSn0w from here and place it in the Pwnage folder. Likewise, download the latest 5.0 firmware from the iOS Dev Center and place it in the same folder.
5.0b4 (4G): iPod4,1_5.0_9A5274d_Restore.ipsw
Extract the RedSn0w zip file by double clicking it.

Step Two
Connect your iPod to the computer and launch iTunes.

Select your iPod from the list of devices on the left. Now hold down Option and click the Restore button. Restore is preferred as it wont create any wasted space on your iPod.

Navigate to the Pwnage folder on your desktop and select the 5.0 firmware ipsw. Click the Choose button to continue.

Step Three
Once iTunes has finished updating your iPod to the desired firmware open the Pwnage folder on your desktop and launch the redsn0w application from the redsn0w folder we extracted earlier.

Step Four
Once RedSn0w opens click the Browse button

Step Five
Select the 5.0 firmware ipsw we placed in the Pwnage folder on our desktop then click Open.

Step Six
Once the firmware has been verified click the Next button to continue.

Step Seven
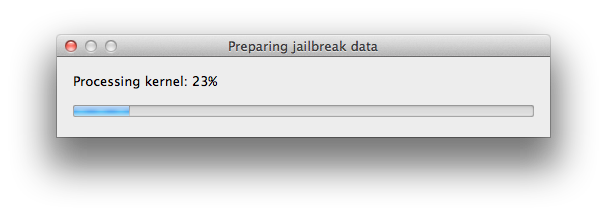
RedSn0w will now prepare the jailbreak data

Step Eight
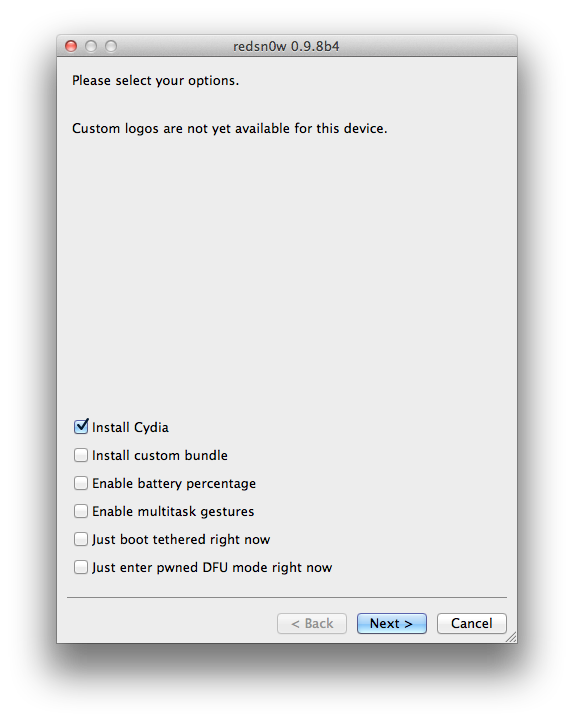
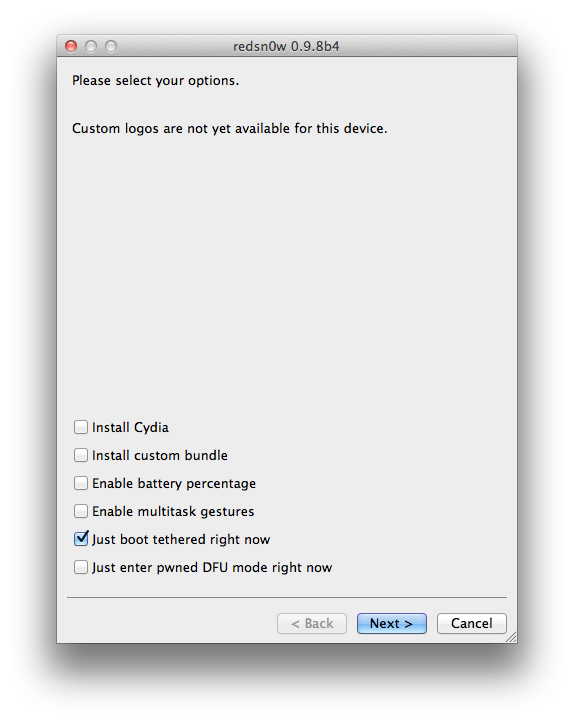
From this window you can select the jailbreak options you would like.
Make sure Cydia is selected and click the Next button to continue.

Step Nine
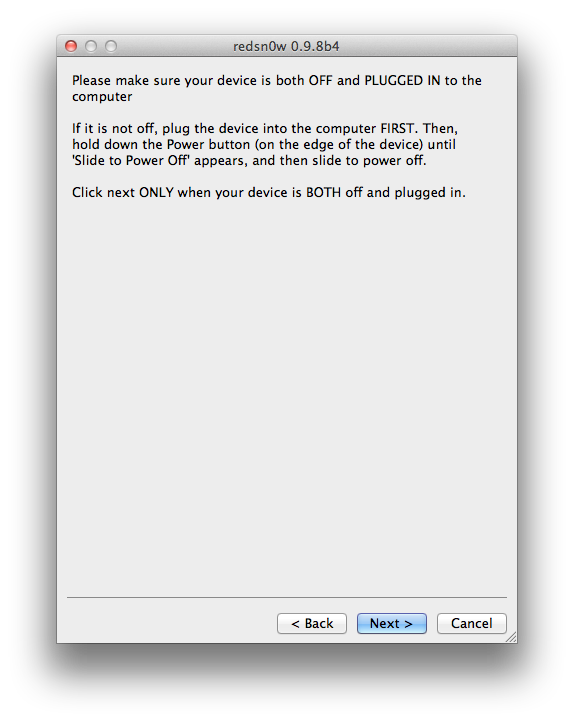
Please plug your iPod into the computer and make sure its OFF then click the Next button

Step Ten
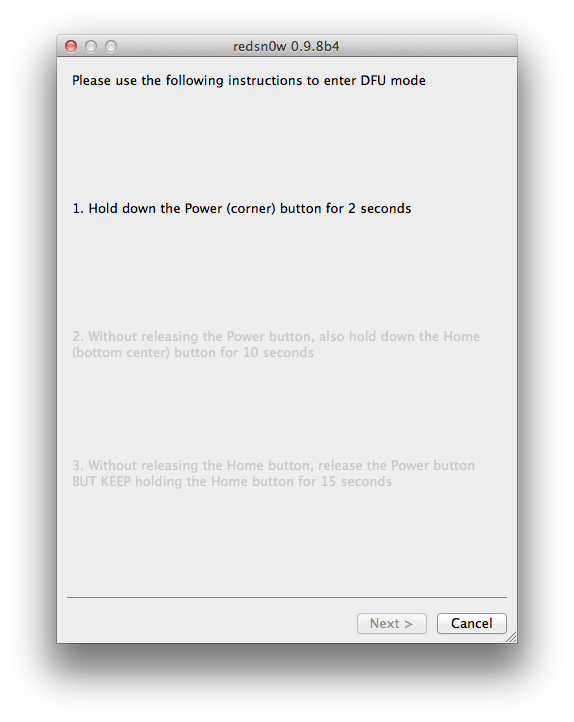
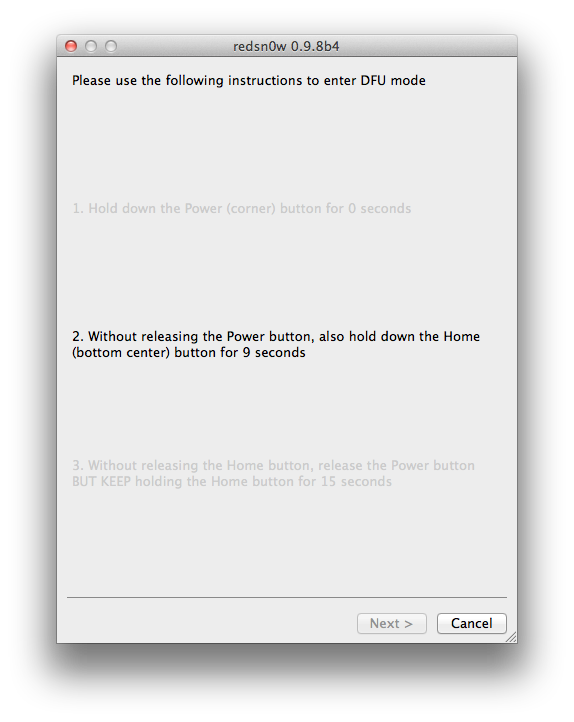
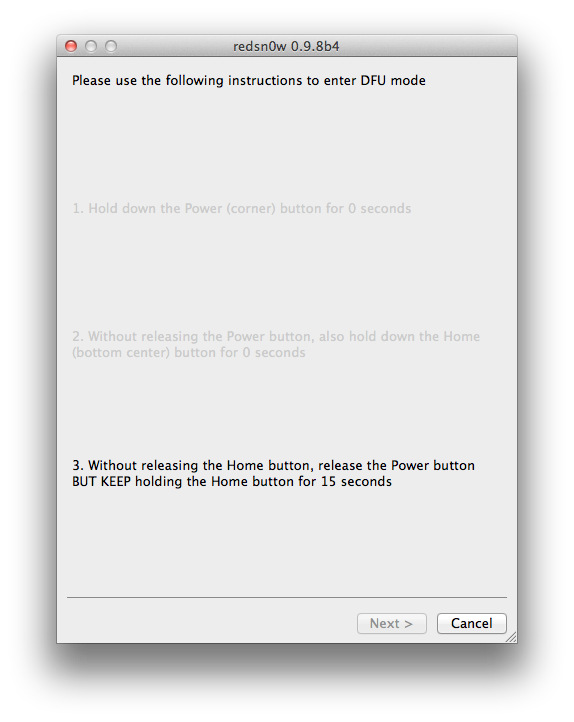
RedSn0w will now guide you through the steps to get into DFU mode.

Hold down both the Home button and the Power button for 10 seconds.

Release the Power button and continue holding the Home button until RedSn0w detects the device.

Step Eleven
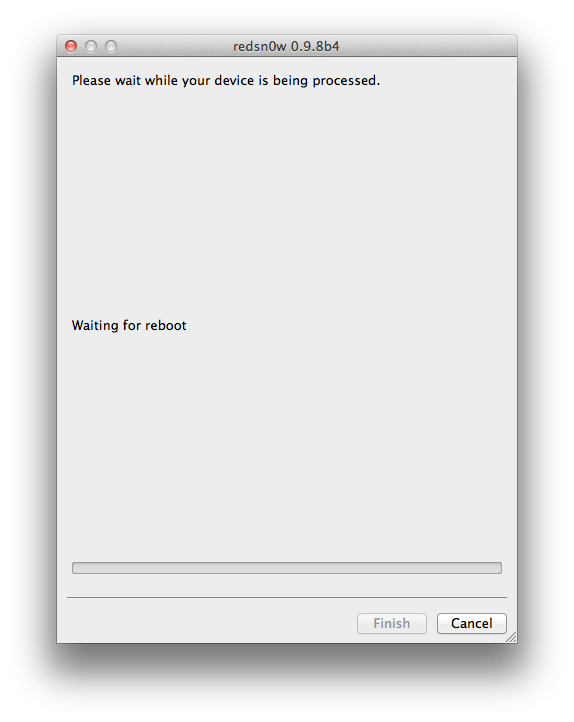
Your iPod will now reboot

Step Twelve
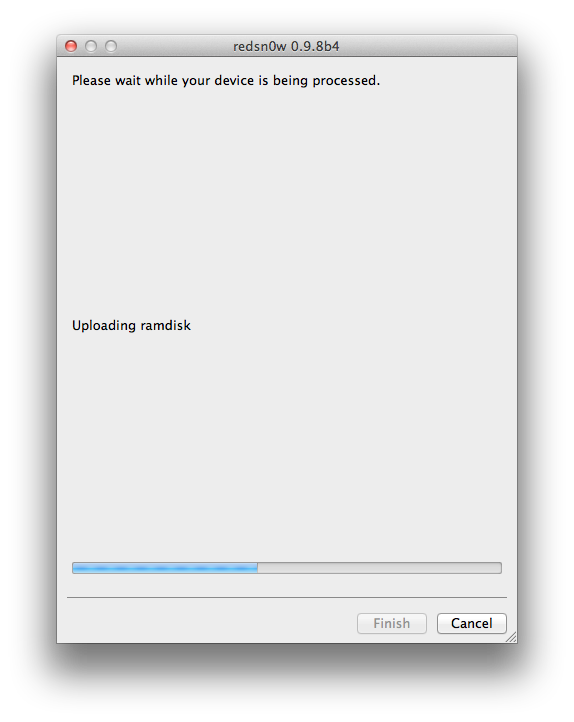
RedSn0w will then begin uploading the new RAM Disk and Kernel.

Step Thirteen
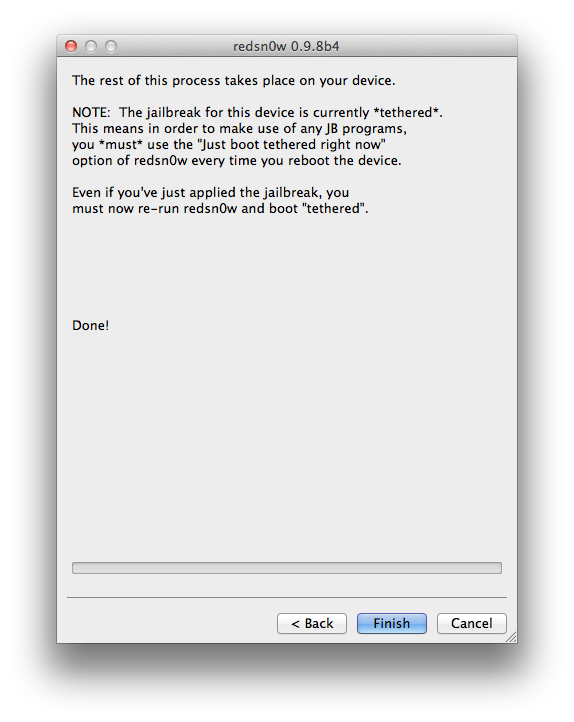
Once this is complete you will be notified that RedSn0w is done. Click the Finish button. When your iPod finishes rebooting (5 minutes or so) it will be jailbroken with Cydia on the SpringBoard.

BOOT TETHERED:
Since this is a tethered jailbreak you must use Redsn0w to help you boot back into your jailbroken device if its powered off for any reason. Simply connect your iPod to the computer, launch RedSn0w, select Just boot tethered right now from the options window and click Next to have RedSn0w boot your device.

*A big thanks to the iPhone Dev-Team and Geohot for their hard work and contribution to the iPhone community.
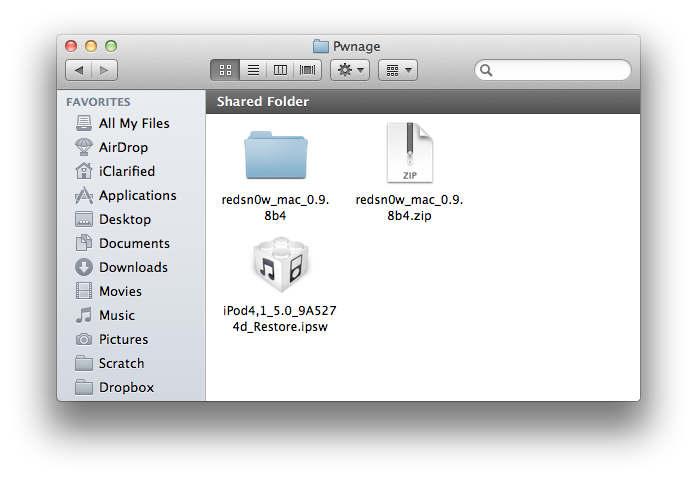
Step One
Create a folder on your desktop called Pwnage
Download RedSn0w from here and place it in the Pwnage folder. Likewise, download the latest 5.0 firmware from the iOS Dev Center and place it in the same folder.
5.0b4 (4G): iPod4,1_5.0_9A5274d_Restore.ipsw
Extract the RedSn0w zip file by double clicking it.
Step Two
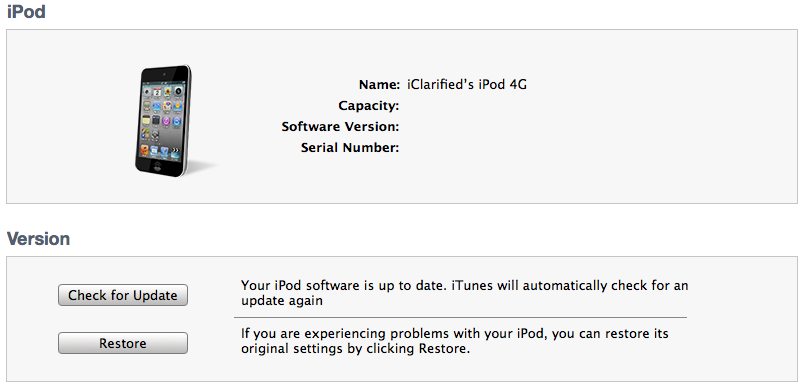
Connect your iPod to the computer and launch iTunes.

Select your iPod from the list of devices on the left. Now hold down Option and click the Restore button. Restore is preferred as it wont create any wasted space on your iPod.
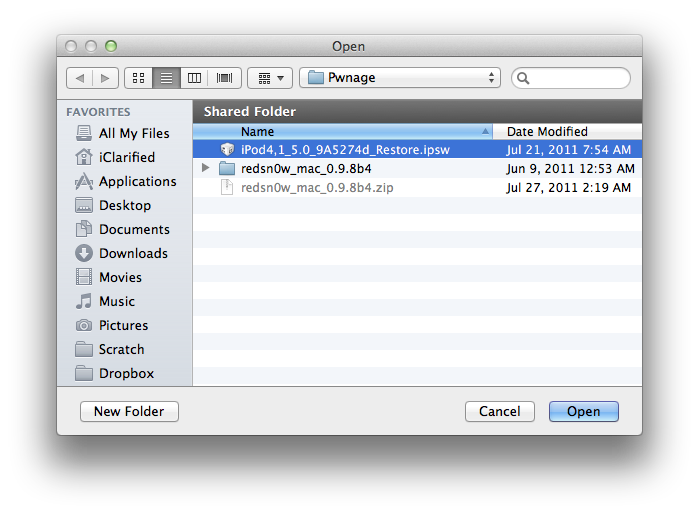
Navigate to the Pwnage folder on your desktop and select the 5.0 firmware ipsw. Click the Choose button to continue.
Step Three
Once iTunes has finished updating your iPod to the desired firmware open the Pwnage folder on your desktop and launch the redsn0w application from the redsn0w folder we extracted earlier.

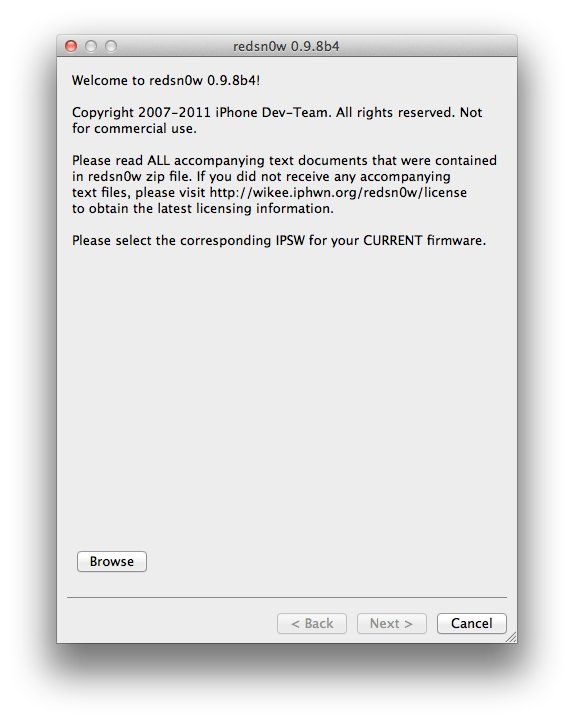
Step Four
Once RedSn0w opens click the Browse button
Step Five
Select the 5.0 firmware ipsw we placed in the Pwnage folder on our desktop then click Open.

Step Six
Once the firmware has been verified click the Next button to continue.
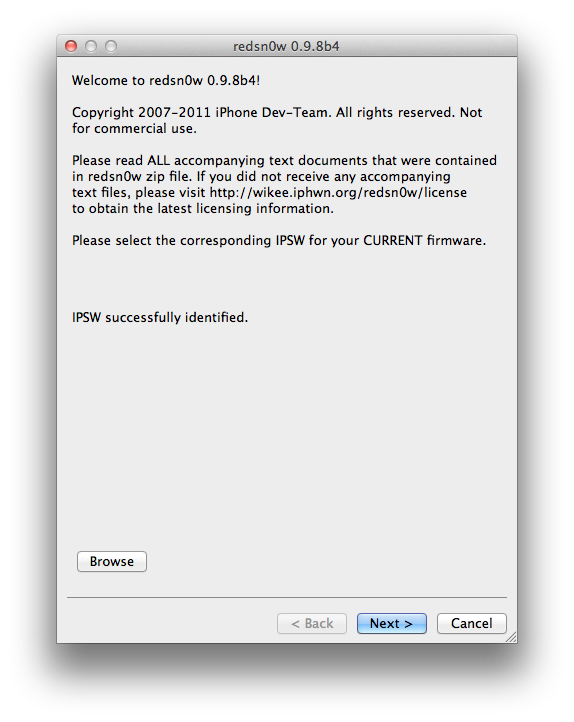
Step Seven
RedSn0w will now prepare the jailbreak data
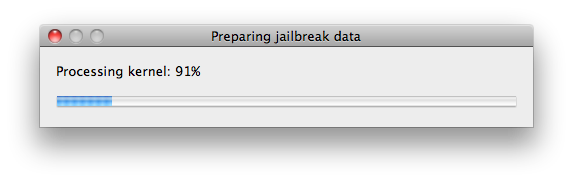
Step Eight
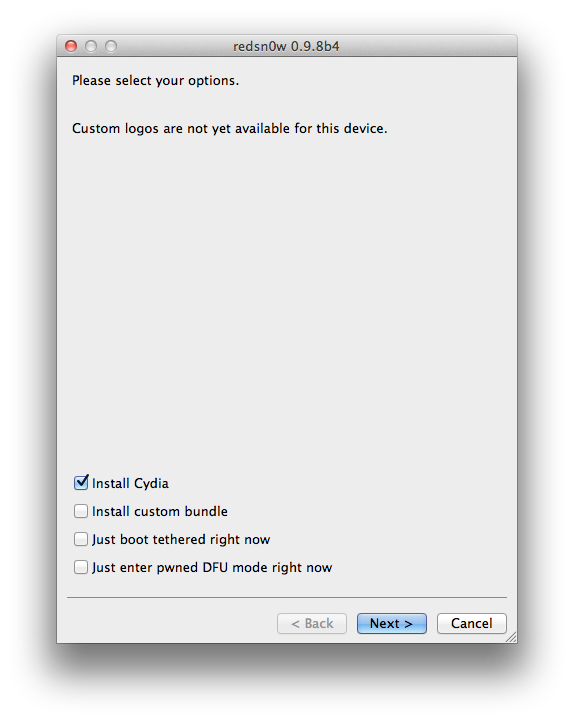
From this window you can select the jailbreak options you would like.
Make sure Cydia is selected and click the Next button to continue.
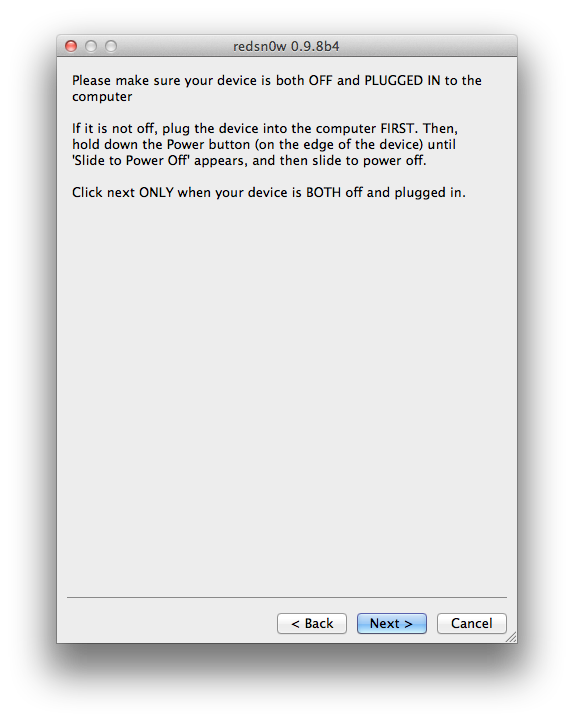
Step Nine
Please plug your iPod into the computer and make sure its OFF then click the Next button
Step Ten
RedSn0w will now guide you through the steps to get into DFU mode.
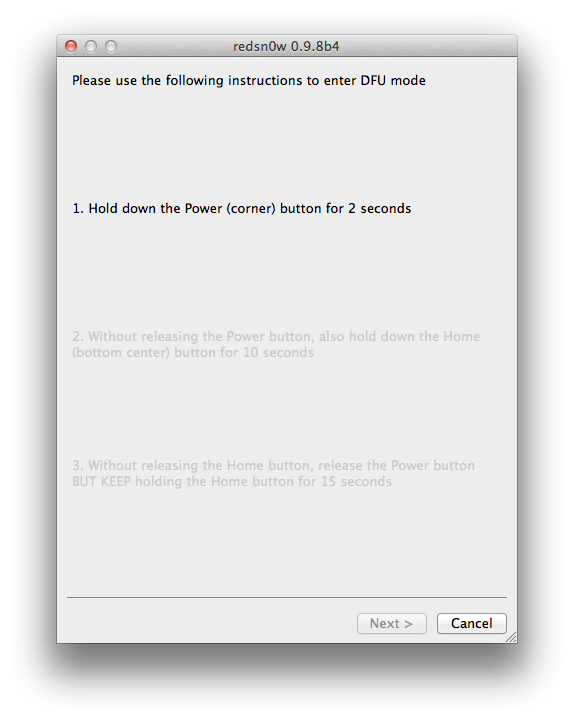
Hold down both the Home button and the Power button for 10 seconds.
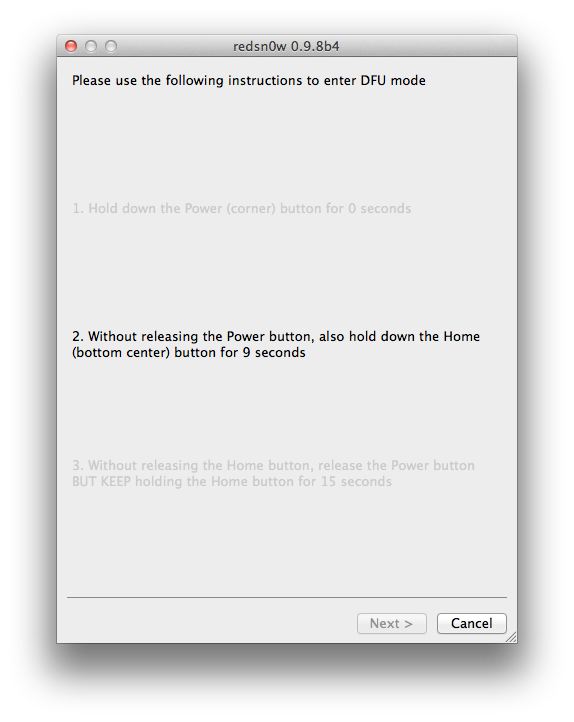
Release the Power button and continue holding the Home button until RedSn0w detects the device.
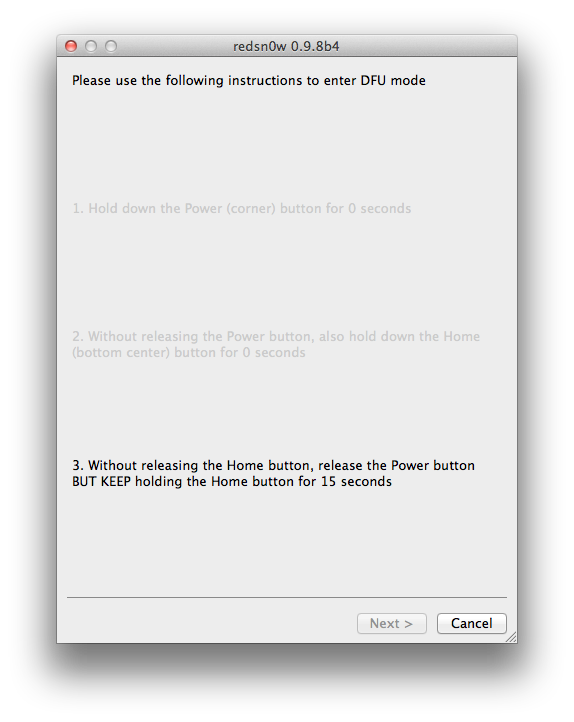
Step Eleven
Your iPod will now reboot
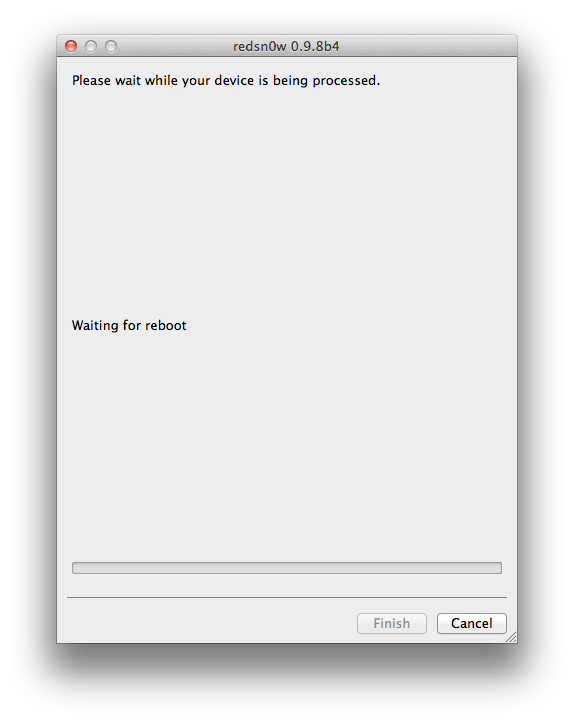
Step Twelve
RedSn0w will then begin uploading the new RAM Disk and Kernel.
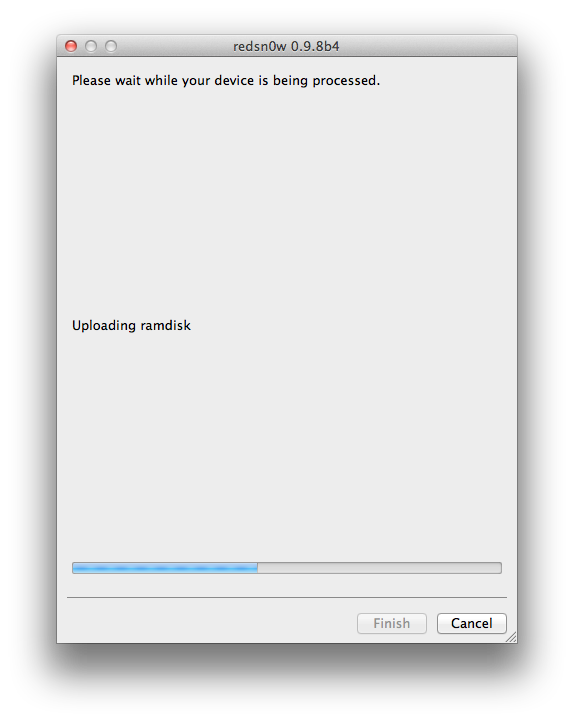
Step Thirteen
Once this is complete you will be notified that RedSn0w is done. Click the Finish button. When your iPod finishes rebooting (5 minutes or so) it will be jailbroken with Cydia on the SpringBoard.
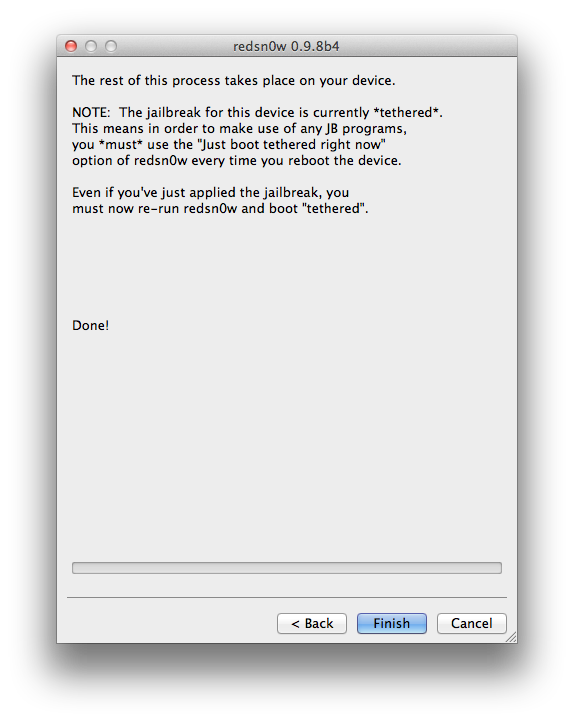
BOOT TETHERED:
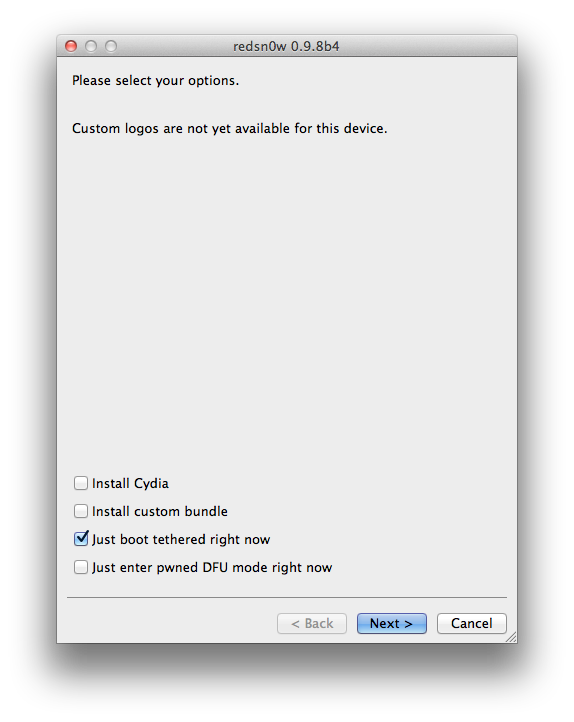
Since this is a tethered jailbreak you must use Redsn0w to help you boot back into your jailbroken device if its powered off for any reason. Simply connect your iPod to the computer, launch RedSn0w, select Just boot tethered right now from the options window and click Next to have RedSn0w boot your device.
*A big thanks to the iPhone Dev-Team and Geohot for their hard work and contribution to the iPhone community.
Saturday, October 12, 2013
How to Downgrade Your iPhone Firmware Using TinyUmbrella Windows
These are instructions on how to downgrade your iPhone firmware using TinyUmbrella. In order to follow this tutorial you must already have saved your SHSH Blobs for the firmware you want to restore to.
You can use this tutorial to downgrade to iOS 4.3.3 in order to jailbreak using JailbreakMe. The Mac version of this tutorial is here.
Step One
Download TinyUmbrella from here and save it in a Pwnage folder on your desktop if dont have it already.
Step Two
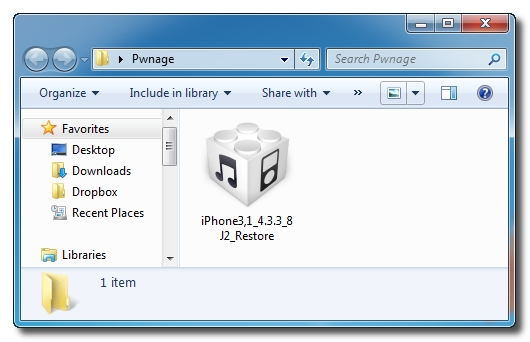
Download the firmware you want to restore to from here and save it in a Pwnage folder on your desktop. Remember you must have saved your SHSH Blobs for this firmware already.
Step Three
Launch TinyUmbrella by double clicking its icon.
Step Four
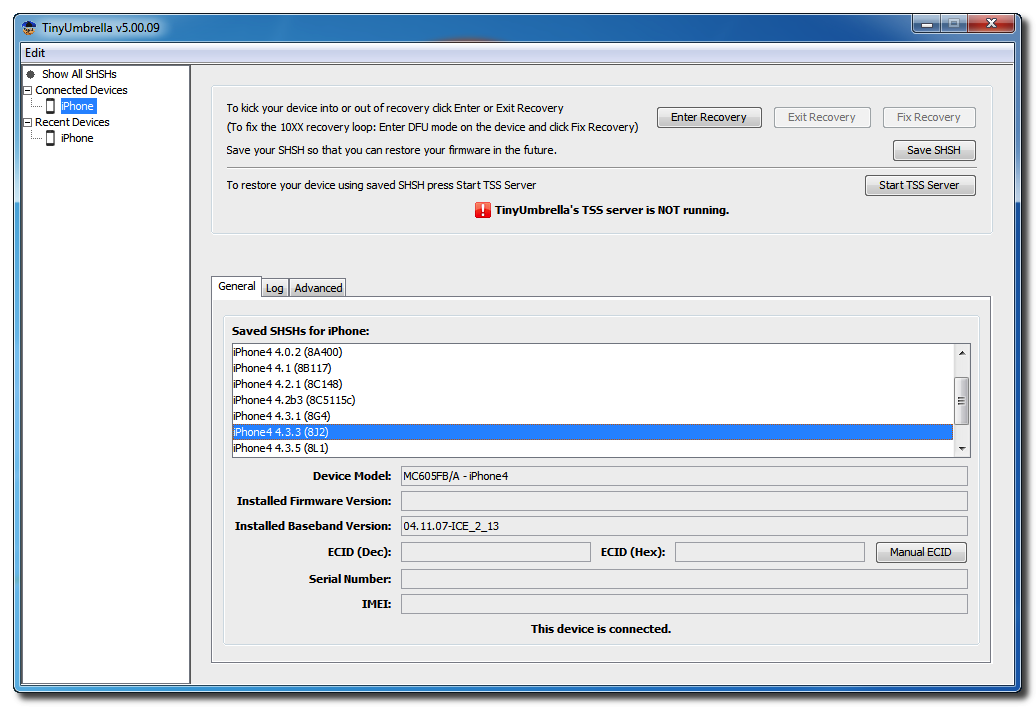
Connect your device and make sure it lists saved SHSH Blobs for the firmware you are restoring to. You may need to click Save SHSH to restore your blobs from Cydia if you dont see any listed.
Step Five
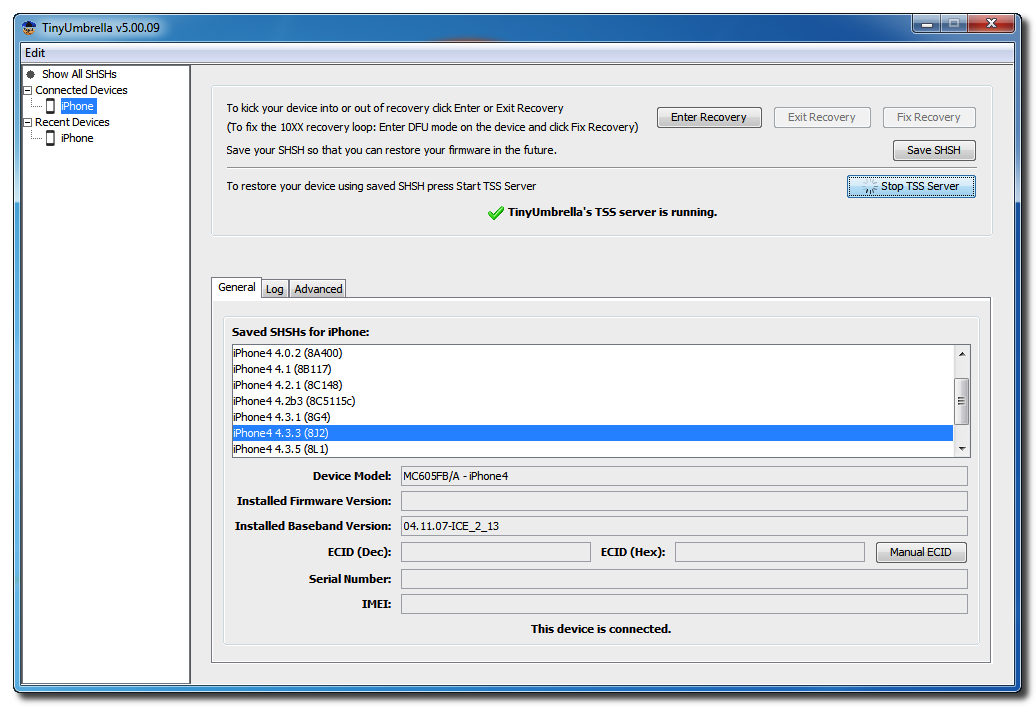
Click the Start TSS Server button.
*Do not continue if TinyUmbrellas TSS server is not started successfully.
Step Six
Launch iTunes by clicking its icon in your Start Menu.
Step Seven
Place your iPhone into DFU mode by holding down the Power and Home buttons for 10 seconds then release the Power button and continue holding the Home button for another 10 seconds.
You can find help with DFU mode here.
Step Seven
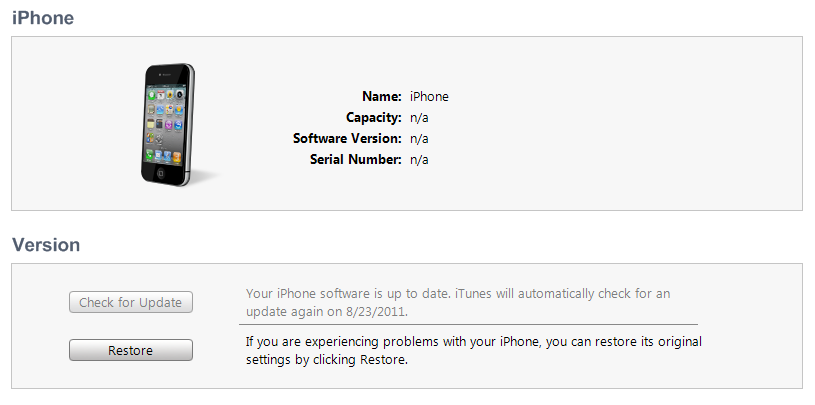
Select your iPhone from the list of devices on the left, hold down the Shift key and click Restore.
Step Eight
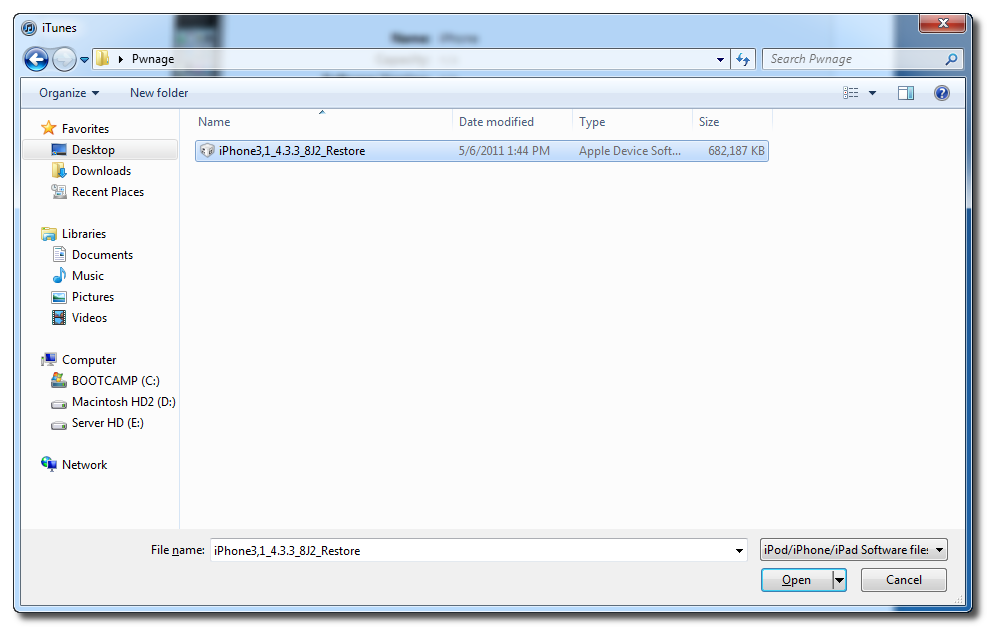
Navigate to the Pwnage folder on your desktop, select the ipsw file you downloaded and click the Open button.
Step Nine
iTunes will now restore to the lower firmware version.
Step Ten
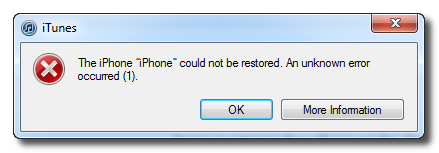
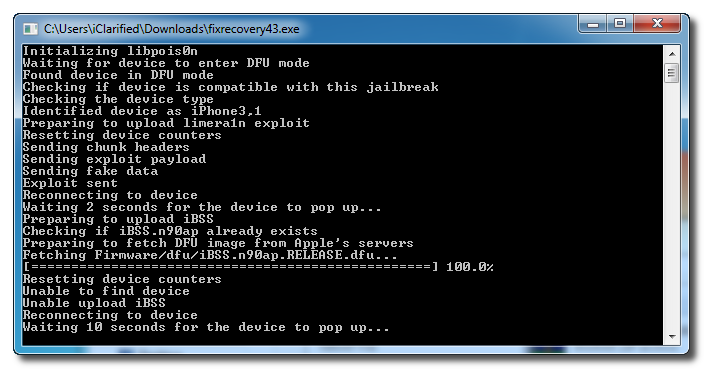
If you happen to get an Error 1 or you get stuck in recovery mode, you will need to use FixRecovery to get your device out of recovery mode.
Download FixRecovery from here and save it to the Pwnage folder on your desktop. Then extract the archive.
Download zlib1.dll from here and save it to the Pwnage folder on your desktop. Then extract the archive.
Step Eleven
Place your iPhone into DFU mode by holding down the Power and Home buttons for 10 seconds then release the Power button and continue holding the Home button for another 10 seconds.
You can find help with DFU mode here.
Step Twelve
Double click to launch the fixrecovery43 executable we just extracted.
Step Thirteen
FixRecovery will perform its magic after which your device will be successfully rebooted.
IMPORTANT:
● If fixrecovery does not work the first time you may need to rerestore to your desired firmware version and try again. Remember to keep the TSS Server running during your second restore as well.
● This tutorial does work to get your from iOS 5 beta back down to iOS 4. Although some have reported less issues with a lower version of iTunes this tutorial was tested to work with iTunes 10.5.0.77.










Friday, October 11, 2013
Save SHSH of iOS 4 3 3 and 4 2 8 Using iSHSHit 1 0 8

Saving SHSH is a big issue for jailbreakers, if you don’t save them on time you can get into some troublesome downgrading. For this we already had TinyUmbrella but now iSHSHit has also been updated to version 1.0.8, it’s an alternative to TinyUmbrella. iSHSHit allows you to save SHSH blobs of iOS 4.3.3 and iOS 4.2.8 (Verizon). It does the same job as TinyUmbrella the difference is you can install it on your device where as TinyUmbrella is installed on your computer.
iSHSHit allows you to make a backup of your device SHSH certificates and save them on your device. It also send your saved SHSH blobs via email, also automatically saves your SHSH blobs on Cydia servers using Cydia On-File service. If you’re thinking “Why should i use iSHSHit? ” well the answer is pretty simple it’s as easy as clicking a “Save” button.
Thursday, October 10, 2013
How to Jailbreak Your iPod Touch 4G Using RedSn0w Mac 4 3 5
These are instructions on how to jailbreak your iPod touch 4G on the 4.3.5 firmware using RedSn0w for Mac. If you are on 4.3.3 or lower make sure you do NOT update to iOS 4.3.5. Use the untethered JailbreakMe instead.
Step One
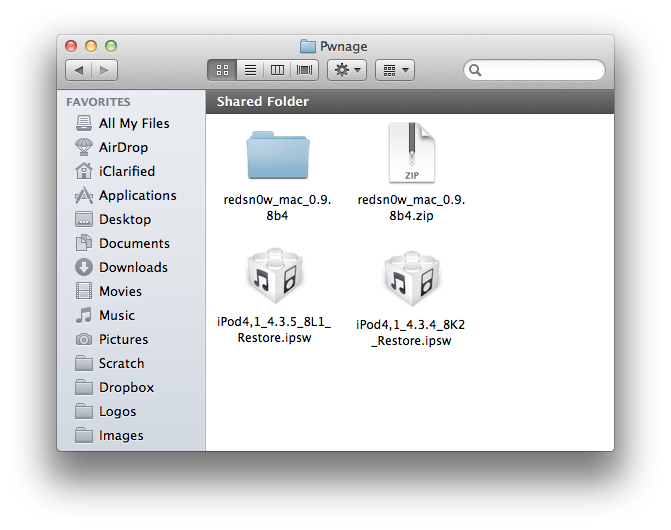
Create a folder on your desktop called Pwnage
Download RedSn0w from here and place it in the Pwnage folder. Likewise, download the latest 4.3.5 firmware from below and place it in the same folder.
4.3.4 (4G): iPod4,1_4.3.4_8K2_Restore.ipsw
4.3.5 (4G): iPod4,1_4.3.5_8L1_Restore.ipsw
Extract the RedSn0w zip file by double clicking it.
Step Two
Connect your iPod to the computer and launch iTunes.
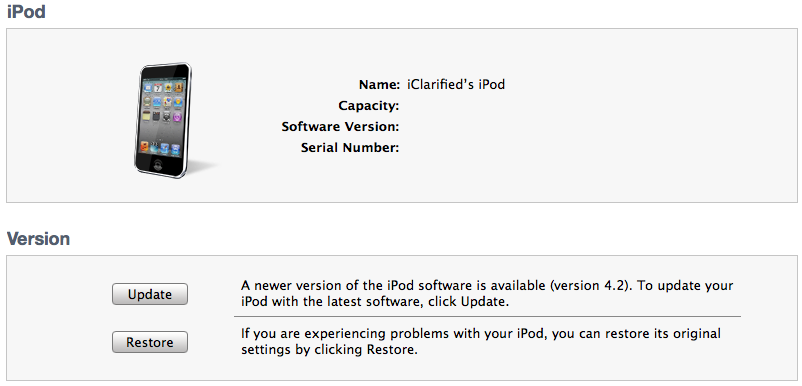
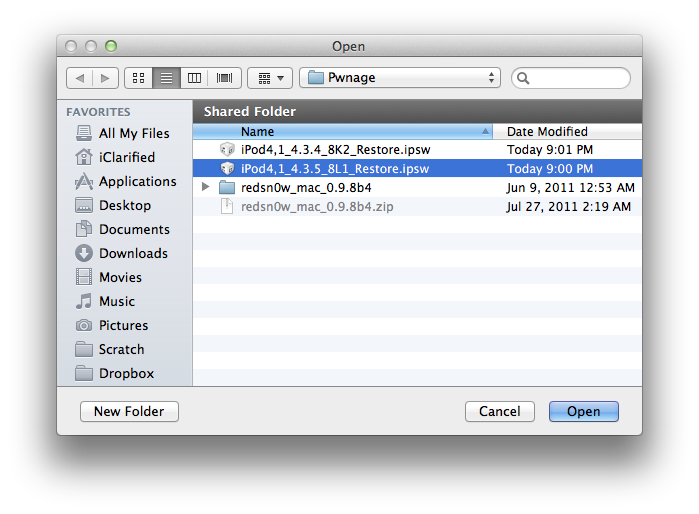
Select your iPod from the list of devices on the left. Now hold down Option and click the Restore button. Restore is preferred as it wont create any wasted space on your iPod.
Navigate to the Pwnage folder on your desktop and select the 4.3.5 firmware ipsw. Click the Choose button to continue.
Step Three
Once iTunes has finished updating your iPod to the desired firmware open the Pwnage folder on your desktop and launch the redsn0w application from the redsn0w folder we extracted earlier.
Step Four
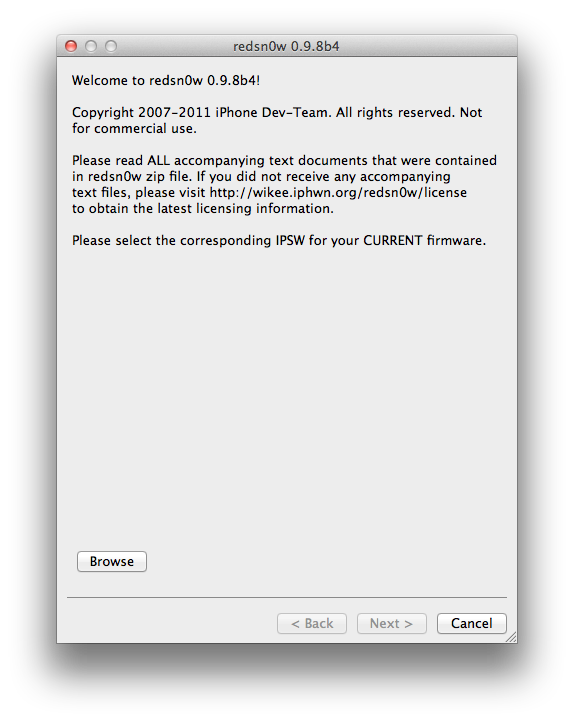
Once RedSn0w opens click the Browse button
Step Five
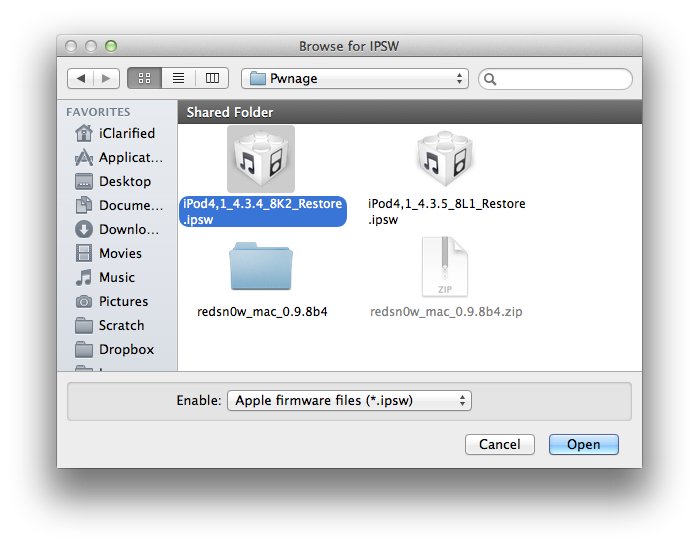
Select the 4.3.4 firmware ipsw we placed in the Pwnage folder on our desktop then click Open.
Step Six
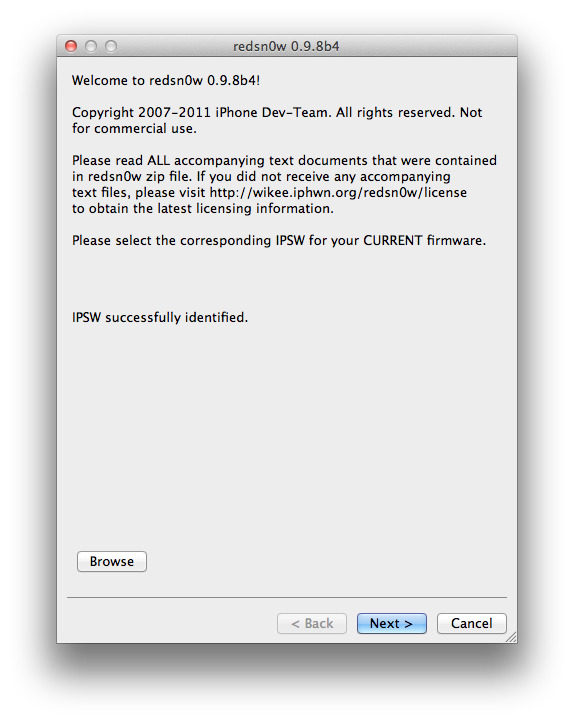
Once the firmware has been verified click the Next button to continue.
Step Seven
RedSn0w will now prepare the jailbreak data
Step Eight
From this window you can select the jailbreak options you would like.
Make sure Cydia is selected and click the Next button to continue.
Step Nine
Please plug your iPod into the computer and make sure its OFF then click the Next button
Step Ten
RedSn0w will now guide you through the steps to get into DFU mode.
Hold down both the Home button and the Power button for 10 seconds.
Release the Power button and continue holding the Home button until RedSn0w detects the device.
Step Eleven
Your iPod will now reboot
Step Twelve
RedSn0w will then begin uploading the new RAM Disk and Kernel.
Step Thirteen
Once this is complete you will be notified that RedSn0w is done. Click the Finish button. When your iPod finishes rebooting (5 minutes or so) it will be jailbroken with Cydia on the SpringBoard.
BOOT TETHERED
Once RedSn0w has finished jailbreaking your device you will need to boot it tethered. Rerun RedSn0w and this time select Just boot tethered right now from the list of options instead of installing Cydia.
*As usual a big thanks to the iPhone Dev-Team and Geohot for their hard work and contribution to the iPhone community.


Subscribe to:
Posts (Atom)