Showing posts with label windows. Show all posts
Showing posts with label windows. Show all posts
Friday, March 14, 2014
Create your own Shortcut using Run Command on Windows
If you are using some programs very frequently, Then here is trick you can create your own Run command to make your program to start faster.
You need to follow some simple steps to create your own shortcut command :
- Open the Run dialog from Start menu or use shortcut command Win+R
- Enter %windir% to open windows directory
- Now enter ALT +F to open file menu, then Press W and then S
- You will see a new pop up window to create shorcut
- Browse the desired program , and go through the wizard to create the shortcut to the desired program (Eg - Browse a program mozilla firefox and give a shorcut name mf)
- To start program, Type the name you give shortcut in Run Dialog (Eg - Type mf in Run dialog, mozilla firefox will open)
So Enter Window+R for Run dialog , and type shortcut name , its done ...

Saturday, October 12, 2013
How to Downgrade Your iPhone Firmware Using TinyUmbrella Windows
These are instructions on how to downgrade your iPhone firmware using TinyUmbrella. In order to follow this tutorial you must already have saved your SHSH Blobs for the firmware you want to restore to.
You can use this tutorial to downgrade to iOS 4.3.3 in order to jailbreak using JailbreakMe. The Mac version of this tutorial is here.
Step One
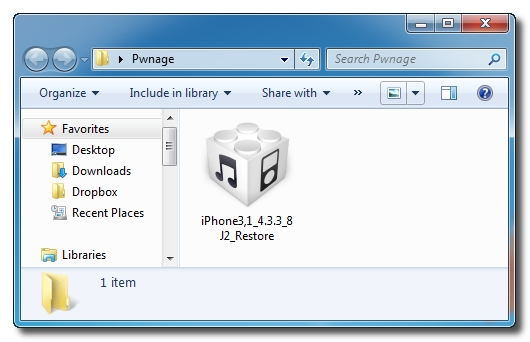
Download TinyUmbrella from here and save it in a Pwnage folder on your desktop if dont have it already.
Step Two
Download the firmware you want to restore to from here and save it in a Pwnage folder on your desktop. Remember you must have saved your SHSH Blobs for this firmware already.
Step Three
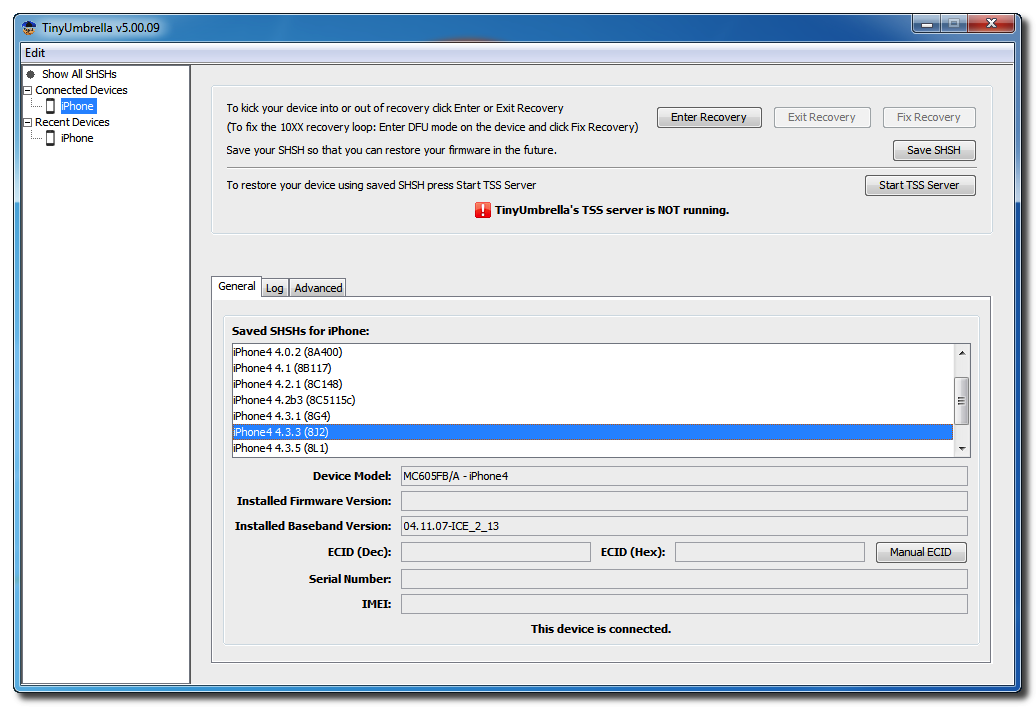
Launch TinyUmbrella by double clicking its icon.
Step Four
Connect your device and make sure it lists saved SHSH Blobs for the firmware you are restoring to. You may need to click Save SHSH to restore your blobs from Cydia if you dont see any listed.
Step Five
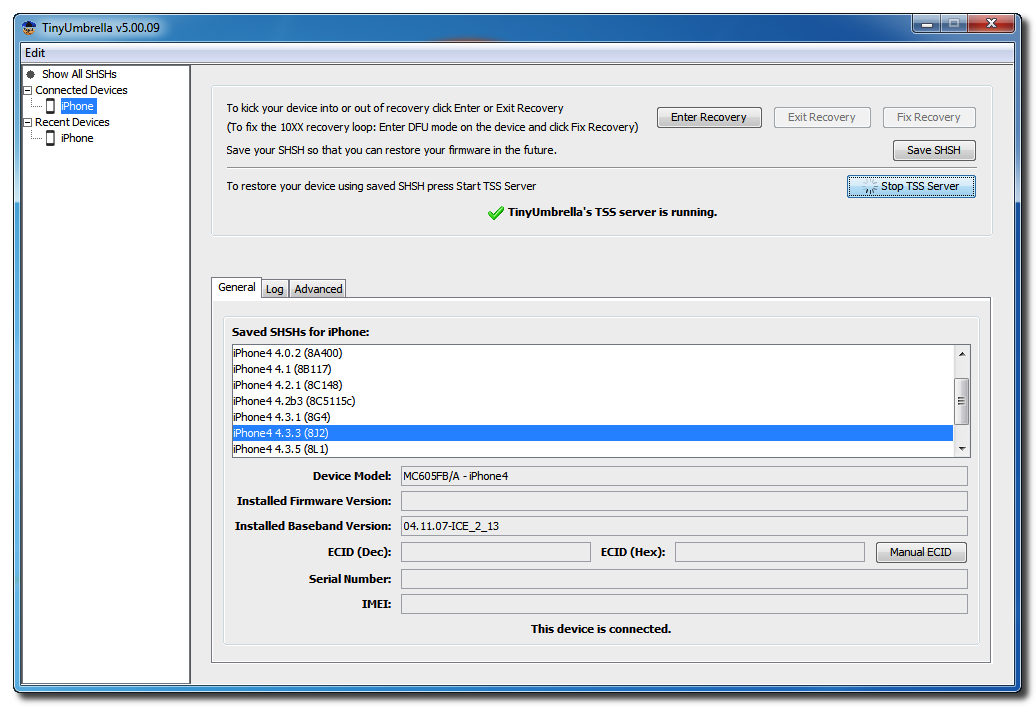
Click the Start TSS Server button.
*Do not continue if TinyUmbrellas TSS server is not started successfully.
Step Six
Launch iTunes by clicking its icon in your Start Menu.
Step Seven
Place your iPhone into DFU mode by holding down the Power and Home buttons for 10 seconds then release the Power button and continue holding the Home button for another 10 seconds.
You can find help with DFU mode here.
Step Seven
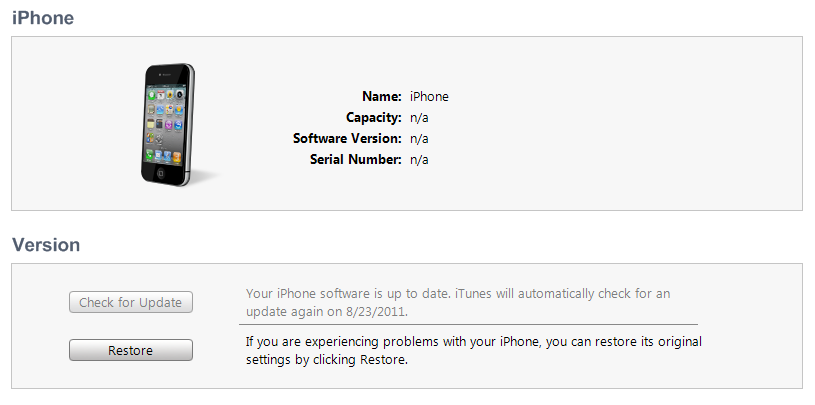
Select your iPhone from the list of devices on the left, hold down the Shift key and click Restore.
Step Eight
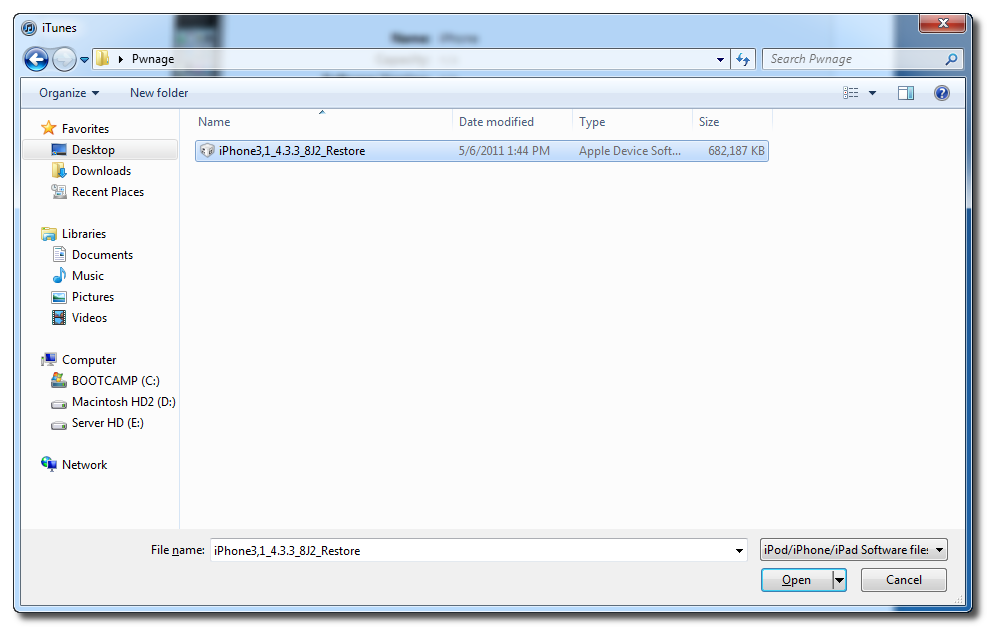
Navigate to the Pwnage folder on your desktop, select the ipsw file you downloaded and click the Open button.
Step Nine
iTunes will now restore to the lower firmware version.
Step Ten
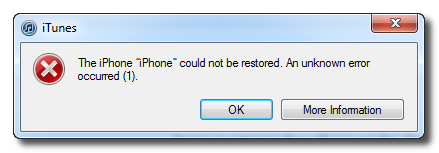
If you happen to get an Error 1 or you get stuck in recovery mode, you will need to use FixRecovery to get your device out of recovery mode.
Download FixRecovery from here and save it to the Pwnage folder on your desktop. Then extract the archive.
Download zlib1.dll from here and save it to the Pwnage folder on your desktop. Then extract the archive.
Step Eleven
Place your iPhone into DFU mode by holding down the Power and Home buttons for 10 seconds then release the Power button and continue holding the Home button for another 10 seconds.
You can find help with DFU mode here.
Step Twelve
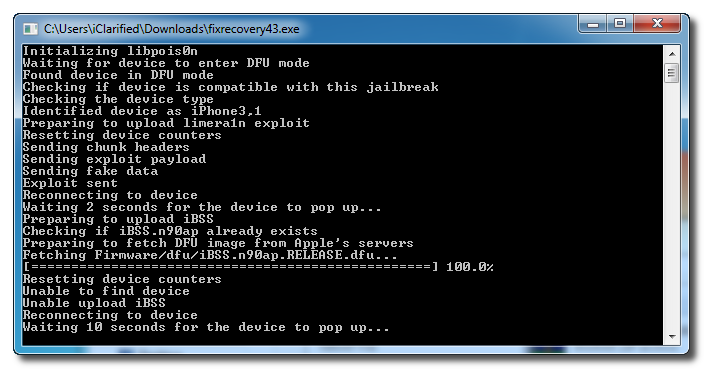
Double click to launch the fixrecovery43 executable we just extracted.
Step Thirteen
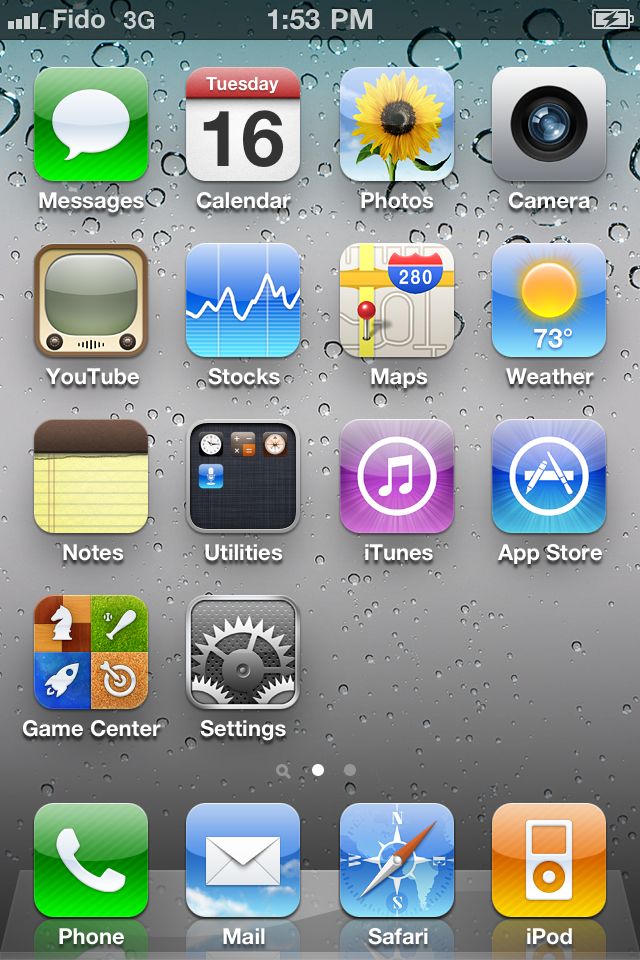
FixRecovery will perform its magic after which your device will be successfully rebooted.
IMPORTANT:
● If fixrecovery does not work the first time you may need to rerestore to your desired firmware version and try again. Remember to keep the TSS Server running during your second restore as well.
● This tutorial does work to get your from iOS 5 beta back down to iOS 4. Although some have reported less issues with a lower version of iTunes this tutorial was tested to work with iTunes 10.5.0.77.









Monday, October 7, 2013
Download Windows 8 Developers Direct Links
Posted on Wednesday, September 14, 2011
Download Windows 8 Now. Microsoft has introduced Windows 8 yesterday. Microsoft has released Windows 8 developers for anyone to preview. Anyone can download Windows 8 developer version, its not limited for developers.
Before Download Windows 8 Developers - Whats Hardware Requirements:
Dont worry, Windows 8 doesnt require special hardware, if your PC / Laptop is running Windows 7 so it will be easily able to run Windows 8, heres the minimum hardware requirements :Windows 8 comes with Metro UI, powerful apps, syncing with the Cloud, separated Application Store, improved performance, support for ARM/x86 and more.
- 1GHz Processor
- 1 GB of RAM
- 16 GB of free hard disk space
- DirectX 9 graphics card with WDDM 1.0
Download Windows 8 Developers [Direct Links] :
Download Windows 8 Developer Preview ISO (64-bit)
Download Windows 8 Developer Preview ISO (32-bit)

Friday, October 4, 2013
Download Sn0wbreeze v2 8b9 To Jailbreak iOS 5 0 1 Beta On Windows
Apple seeded iOS 5.0.1 beta day before yesterday to address battery issues with some minor bug fixes. Today, @iH8n0w has pushed an update to his Windows exclusive custom iOS firmware creation tool i.e Sn0wbreeze v2.8b9 which supports iOS 5.0.1 beta 1 jailbreak on iPhone 4/3GS, iPod touch 3G/4G and original iPad. No support for iPad 2 or iPhone 4S though. Since this jailbreak is once again tethered, iBooty is required to boot into jailbroken state after each reboot.
Here are the release notes:===============================Grab the latest Sn0wbreeze via the following official download link:**********************************************
- Supports iOS 5.0 (9A334)/5.0.1-b1 (9A402)
- Fixed iBooks sandbox crashing issues.
- Fixed location services issues with iPhone 3GS
- Re-added iPad baseband install option to iPhone 3GS.
- Removes UDID requirement/Beta timer in 5.0.1.
- Tethered devices are booted via iBooty which is extracted to the Desktop after running Sn0wBreeze
Download Sn0wbreeze v2.8b9 (For iOS 5.0/5.0.1-b1)

How To Preserve Baseband And Jailbreak iOS 5 Using Sn0wbreeze 2 8B8 Windows User
As you know that Apple pushed out their next-gen iOS 5 publicly with tons of new features yesterday. People who rely on unlock need to preserve their baseband in order to unlock their iOS devices on iOS 5. Mac OS user were able to do so with redsn0w 0.9.9b5 which was released earlier today. But what about Windows users ? Well as you know that iOS 5 GM and iOS 5 were exactly similar so it’s possible to jailbreak your iOS device on iOS 5 on Windows with Sn0wbreeze 2.8b8 and preserve baseband at the same time.
Some changes have been made in Sn0wbreeze v2.8b8, now it will verify IPSW files very quickly and believe me it’s really fast. Snowbreeze 2.8B8 will jailbreak all your iOS device and this jailbreak will be tethered, which means you’ll have to boot your iOS device in jailbroken state using iBooty every time you reboot.
If you don’t know about Sn0wbreeze it’s a custom (pre-jailbroken) firmware builder for Windows as Pwnage Tool is for Mac.
Sn0wbreeze v2.8b8 Release notes:sn0wbreeze v2.8b8 [GM] – Release NotesFollow these instructions to jailbreak iOS 5 GM on your iPhone 3GS, iPhone 4, iPod Touch 3G, iPod Touch 4G, and iPad 1 using Sn0wbreeze 2.8b8.
————————————-
* INSTANT IPSW detection (seriously!).
* Now jailbreaks iOS 5 Gold Master (9A334).
* UDID Developer check removal is no longer needed.
* Still has the ability to hacktivate.
* Still preserves the baseband (as always!).
————————————-
Tethered Boot?
————————————-
* iPhone 3GS (old bootrom)………NO
* iPhone 3GS (new bootrom)……..YES
* iPhone 4 (GSM)………………YES
* iPhone 4 (CDMA)……………..YES
* iPod Touch 3G……………….YES
* iPod Touch 4………………..YES
* iPad 1G…………………….YES
————————————-
** REMEMBER TO BOOT WITH “iBooty” **
Things you will be needing during this process:How To Preserve Baseband And Jailbreak iOS 5
- iOS 5 IPSW (Download from here)
- iTunes 10.5 (Download from here)
- Sn0wbreeze v-2.8b8 (Download from here)
Step 1: Extract and run Sn0wbreeze-v2.8b8.zip (Windows Vista or Windows7 users must start the application in Administrator mode. To do so, right click mouse button on the icon and selecting “Run as administrator”Step 2: Connect your iPhone 4, 3GS or iPod Touch to your PC via USB.
Step 3: Click “Browse” button and select iOS 5.0 GM firmware (IPSW) which you downloaded earlier, you can also drag and drop .IPSW file on the given area.Step 4: Sn0wbreeze will automatically verify the .ipsw file and the device which is required to be jailbroken. Sn0wbreeze will check the firmware if it is correct. Once the iOS 5 IPSW is verified, click the blue arrow button to continue.
Step 5: Sn0wbreeze will give you option to select either “Simple Mode”, “Expert Mode” or “Baseband Preservation Mode” . Select ‘Simple Mode’ and press the blue next buttonStep 6: Click ‘Build IPSW’. Since building custom firmware may take some time, you can optionally play Pac-Man game to kill some time.
Step 7: After completion press ‘OK’ button to follow the onscreen instructions to put your device into restorable state.
To enter DFU mode:If you have followed the steps correctly, you will get the following message from Snw0breeze
- Hold Power and Home buttons for 10 seconds
- Now release the Power button but continue holding the Home button for 10 more seconds
- You device should now be in DFU mode
Restore iOS 5.0 Custom Firmware Using iTunes
Start iTunes, click on your iOS device icon from the sidebar in iTunes. Now press and hold Left “Shift” button on the keyboard and then click on “Restore” (Not “Update” or “Check for Update”) button in iTunes and then release this button.Select the pre-jailbroken custom IPSW that was created (must be on your desktop) and click the Choose button.
Now relax and wait iTunes will do the rest for you. iPhone will restart on completion of firmware installation.
Booting In Tethered Mode:
Step 1: Open iBooty 5.0 folder which was created on your desktop and run iBooty 5.0
Step 2: Select your device and follow the instruction on screen to boot in tethered mode.
Happy Jailbreaking!!


Thursday, October 3, 2013
Free 5 Software To Make Bootable USB Windows

Free 5 Software To Make Bootable USB Windows - Now, to install Windows, we can do easily via USB memory stick. This is very useful, because maybe some PC / Laptop to get CD / DVD ROM, the alternatives have to use other media such as USB flash drives, SD cards, external HDD, etc.
In addition, alternative or CD-DVD, with USB-based storage media in the area, because we can do it only when necessary and may also be deleted, so do not need CDs or the radio, which are sensitive to fading. Here is a collection of free software that can be used tocreate a bootable USB, or installation of Windows.
WinUSB Maker
WinUSB maker is portable software to create an external storage media such as USB memory stick or external hard disk to be bootable and can be used to transfer theinstallation file (installation) of Windows for USB.

Some features WinUSB Maker include:
- Backup and recovery (including the MBR, Master Boot Record) with a USB-drive
- Designed with maximum safety, to avoid and prevent errors errir reformat windows
- Can work with Windows in a DVD, a folder or ISO
- Formatting USB NTFS file system
- You can create a DOS drive / USB bootable grldr
- Copy files at maximum speed
- Tool support for more than 1 TB
In addition, there are a number of other features that more can visit WinUSB Maker. This program can run on Windows Vista, 7.8 and Server 2008/2011 (and the need NetFramework 3.5.)
Download WinUSBMaker.7z ( ~ 1.3 MB)
Windows 7 SBB Tool
The program is small and portable can be used to create a bootable USB Windows 7, not just a USB stick, but supports SD Card. To create a bootable USB, we do not use the ISOimage (ISO file) of Windows 7, but we have to manually specify the location of the folder ofwindows (before we can copy from DVD to hard drive).

Download Windows 7 SBB Tool ( 245 KB)
Passcape ISO Burner
Small and portable application PAsscape ISO burner, but the windows, and other ISO file from a bootable USB disk also is an application that creates a bootable CD / DVD, USBdevices (memory sticks, USB sticks, Compact Flash, Secure Digital USB hard disk, etc.)can be used to create.

Some features are as follows:
- CD / DVD and USB drives to transfer files to the ISO
- Bootable media creation
- ISO file, unzip the contents to disk
- A simple interface
This program can run on Windows XP or later. The download Passcape ISO Burner (314 kilobytes)
A Bootable USB
Application of this is the program makers aksvg.com bootable USB to install windows 7.After the run, we can choose the install location of the file (I recommend selecting the same location with a Bootable USB, so it can be portable). To create a bootable USB Windows 7 required a minimum of 4 GB USB.

This application can use the Windows 7 DVD or ISO file. And can run on Windows Vista,server 2008 or windows 7. To run it, we must go through three steps, Check USB Drive,USB Drive and choose Format DVD or ISO. Unfortunately after I try it on windows 7 (version0.9.0.4), when the step USB format, the process is stopped so that I can not continue andmust be closed by End Task. Probably from the Options menu to try the other settings when formatting the USB.
Download A Bootable USB ( 996 KB)
Novicorp WinToFlash
This application has been around long enough, and quite nice to create a bootable USB.Unlike most previous applications that only support windows vista or 7, WinToFlash can be used to create a bootable USB XP/2003/Vista/2008/7/8 windows.

Some WinToFlash features include:
- XP/2003/Vista/2008/7/8 moving windows installation from CD / DVD to USB Flash Drive
- Move WinPE onto a USB
- Creating a USB Flash drive with Windows XP/2003 Emergency Bootloader
- MS_DOS USB transfer
- Creating a USB containing Windows XP/2003 Recovery ConsoleThis program can run on Windows XP/2003/Vista/2008/7 and windows 8.
Download WinToFlash ( 6.9 MB)
Wednesday, October 2, 2013
Install Windows 8 Preview on Your Mac Using Boot Camp
These are instructions on how to install Windows 8 Consumer Preview on your Mac using Boot Camp.
Before you begin this tutorial you will need the Windows 8 Consumer Preview ISO and Product Key. Those of you with a DVD burner will need to burn this ISO to DVD before continuing. Those of you (like us) without a DVD drive will need to connect a blank 8GB USB flash drive before beginning.
Step One
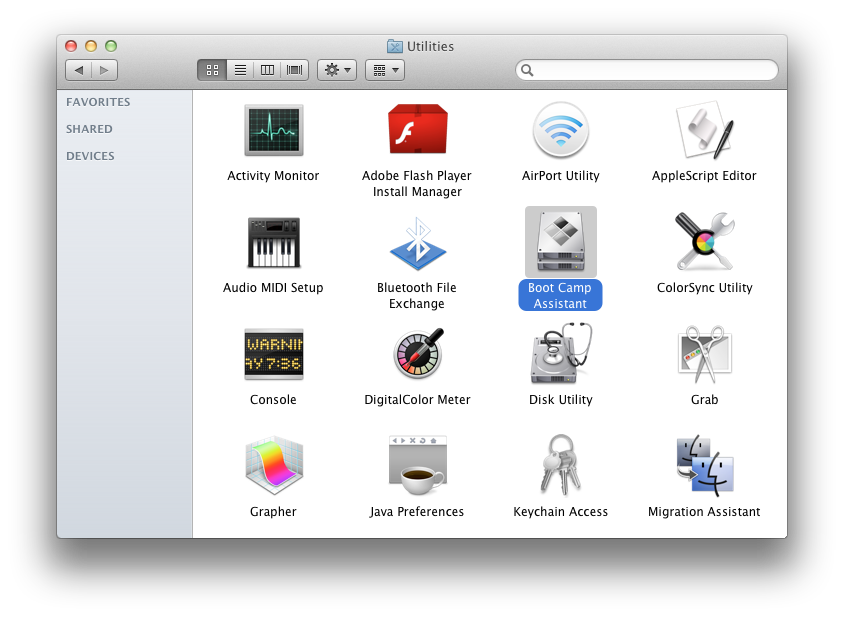
Open a new Finder window by clicking the Finder icon in your dock.
Step Two
Navigate to the Applications : Utilities folder and double click the Boot Camp Assistant icon to launch the application.
Step Three
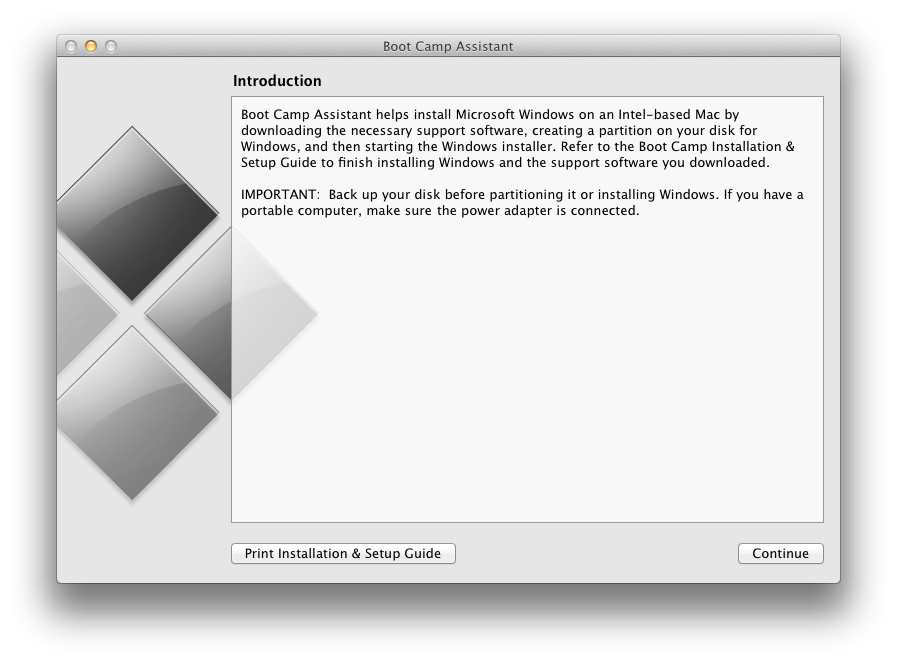
The Boot Camp Assistant will open. Click the Continue button.
Step Four
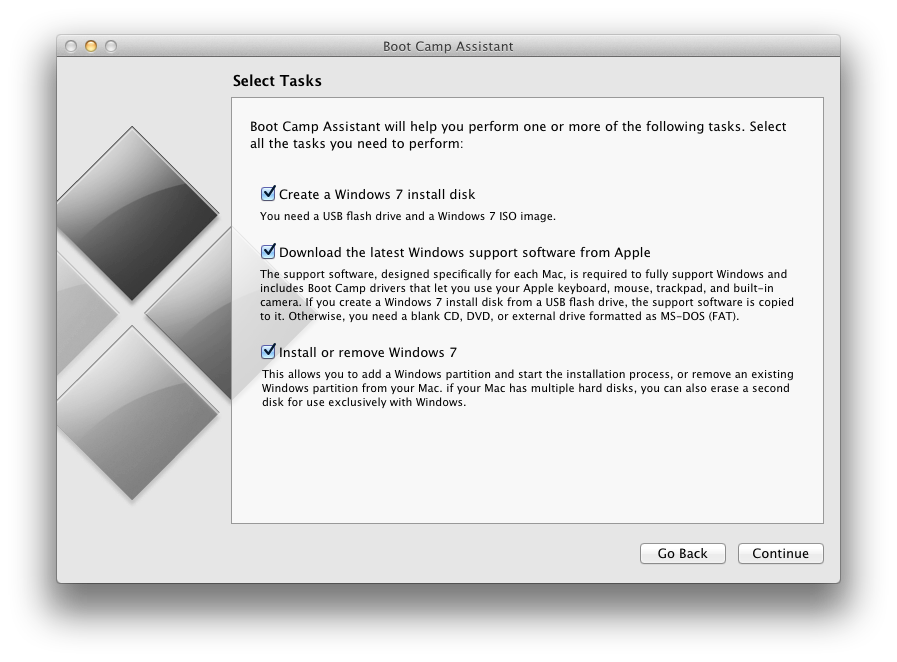
You will now be asked to select from a series of tasks. Leave all 3 tasks selected and click Continue.
Step Five
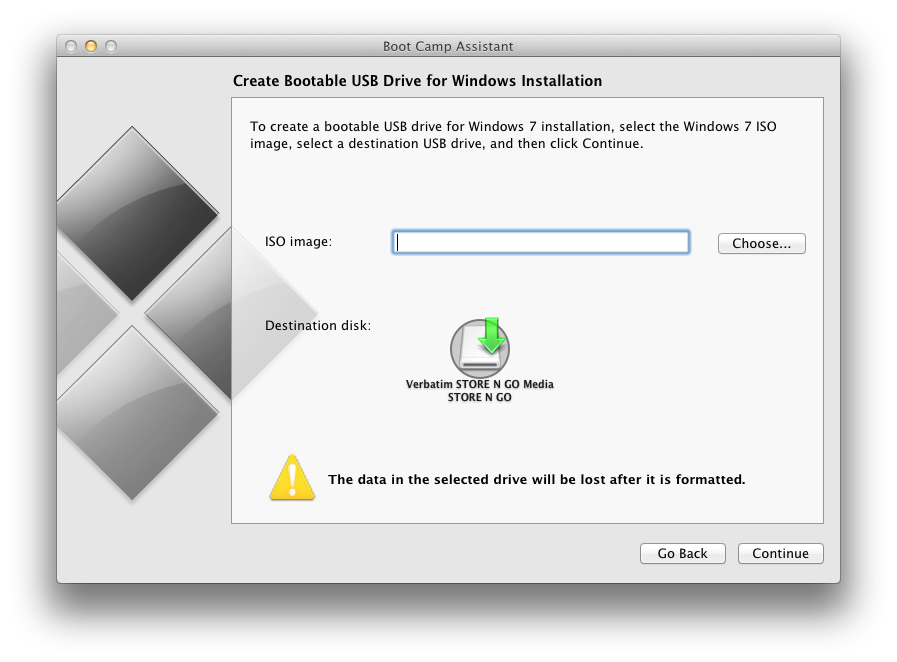
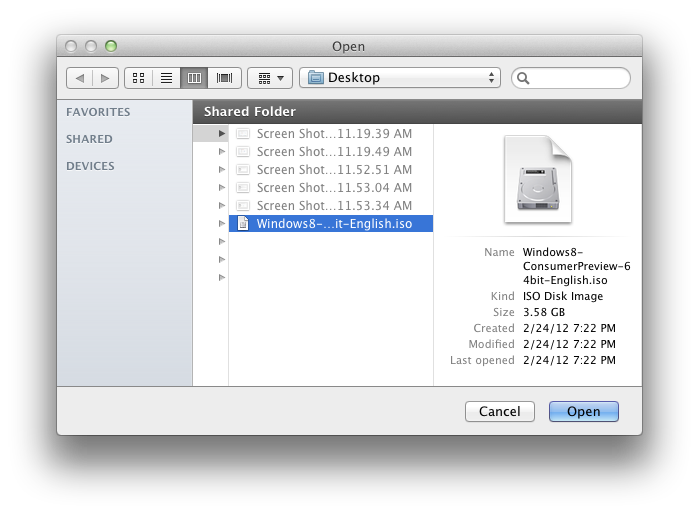
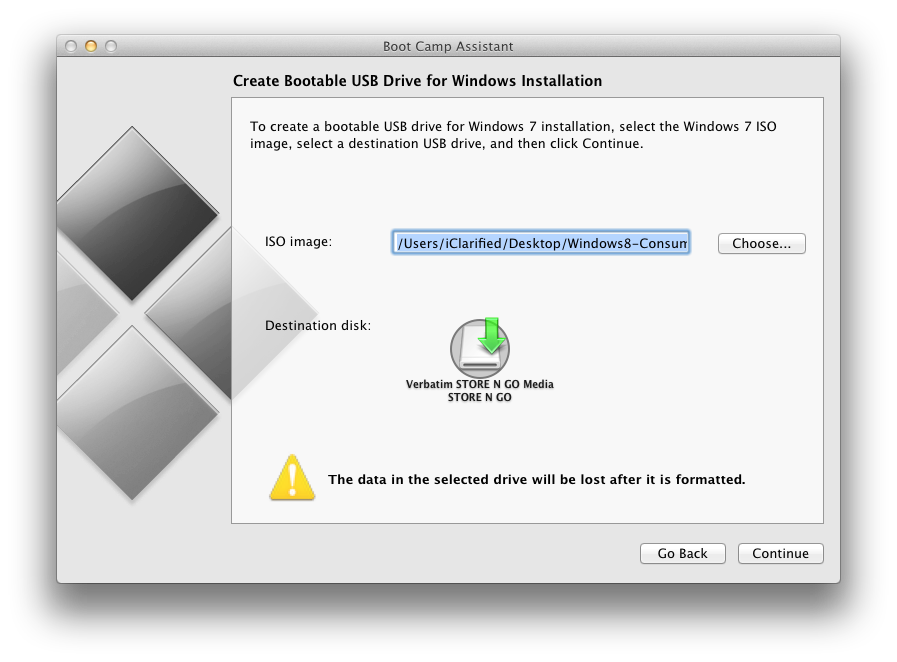
Click the Choose button, select the ISO you just downloaded, and click Open.
Make sure the correct USB flash drive is set as the destination disk and click the Continue button.
Step Six
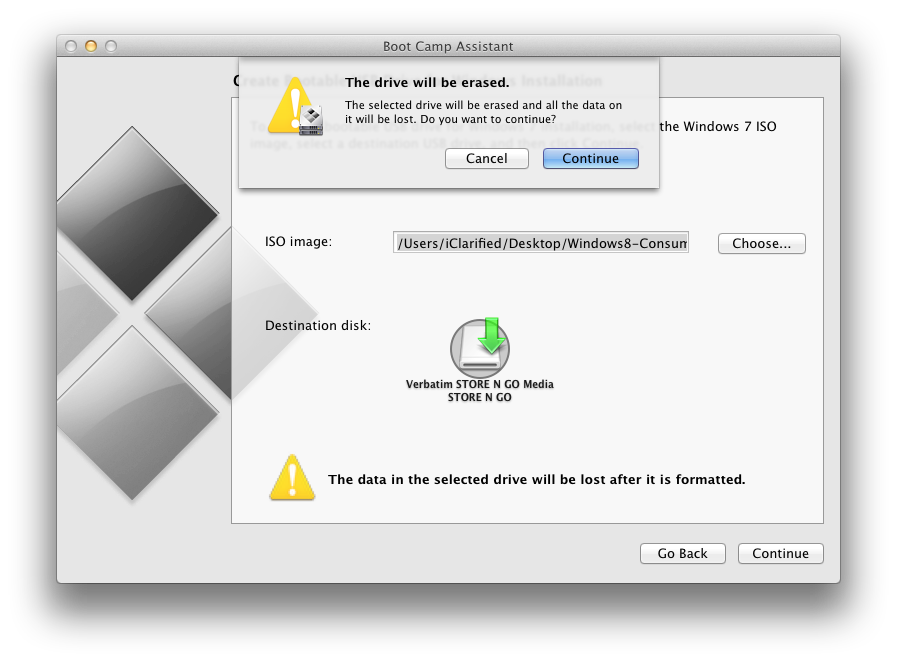
You will be warned that the drive will be erased. Click Continue.
Step Seven
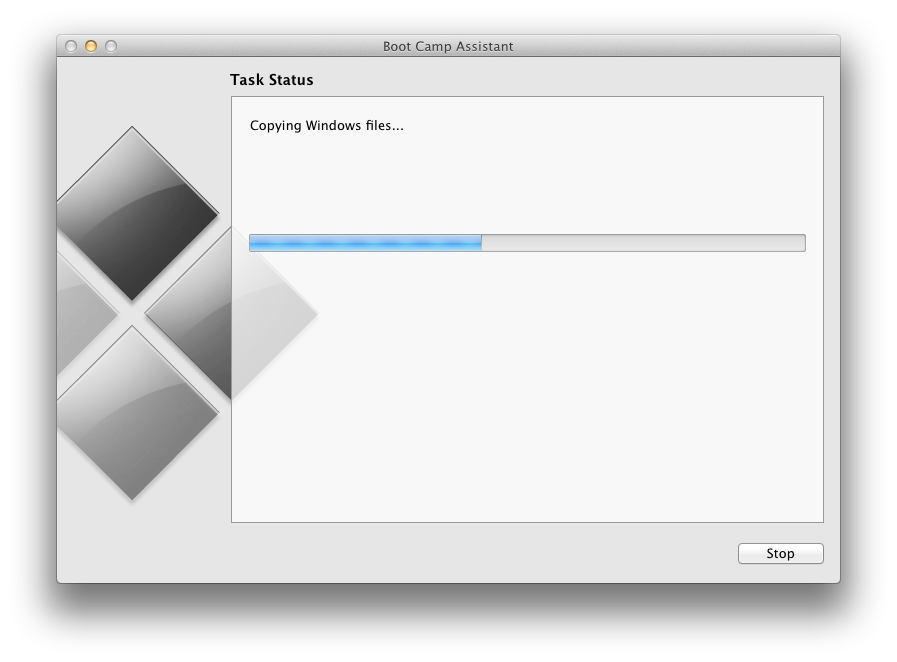
Boot Camp Assistant will now copy the Windows files to the USB flash drive.
Step Eight
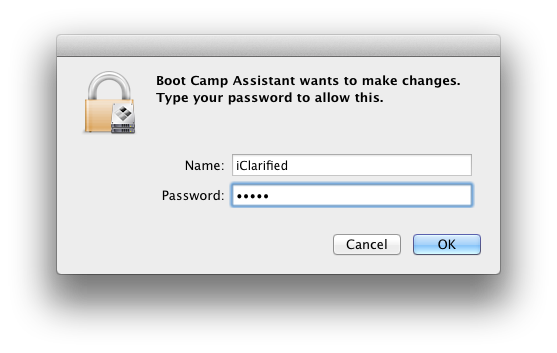
You will be asked to enter your Administrative username and password. Do this, then click the OK button.
Step Nine
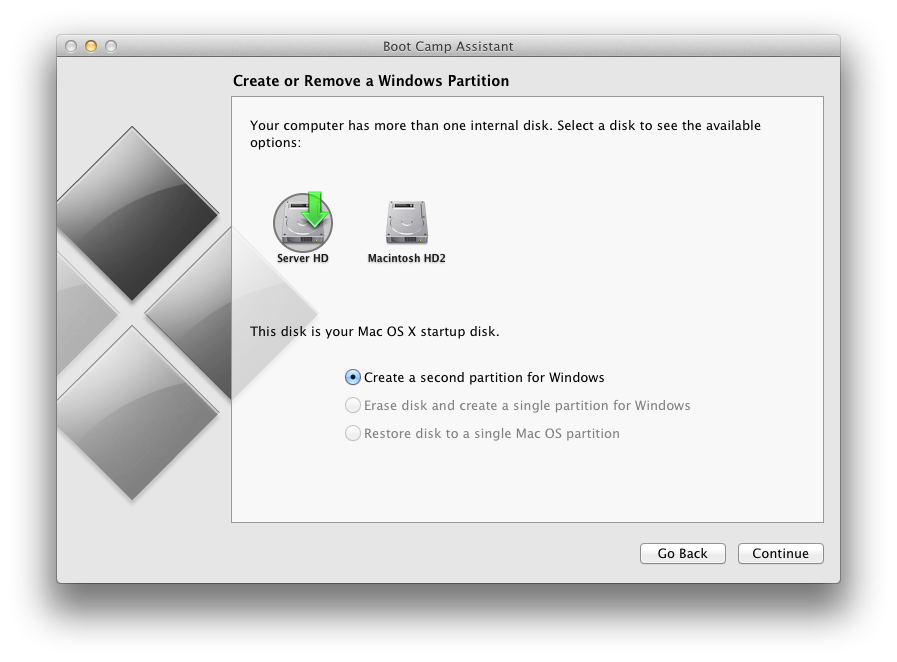
If you have more than one hard drive, you will be asked to select which system hard drive you would like to partition for Windows. Choose the correct hard drive and click the Continue button.
Step Ten
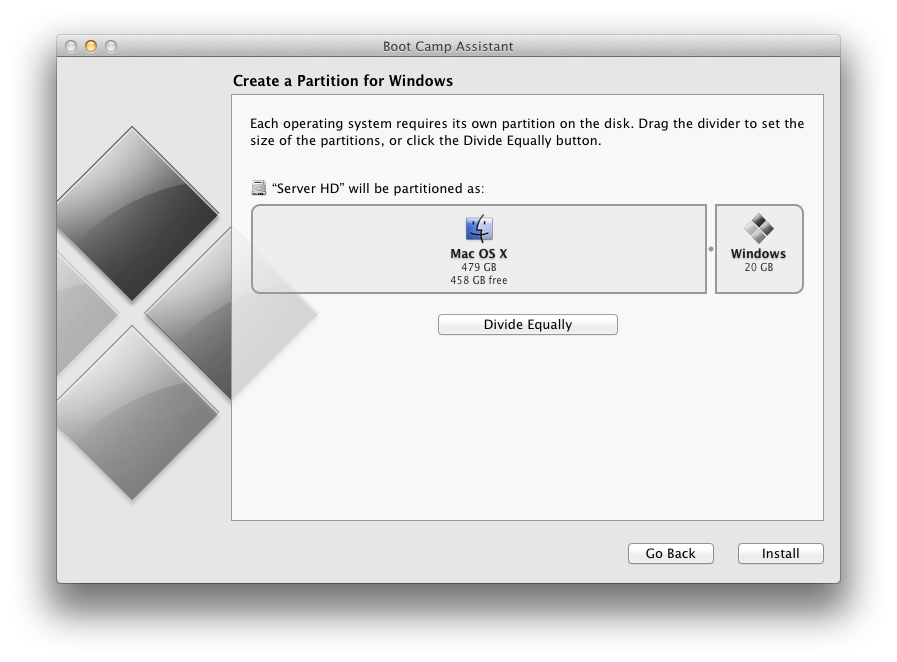
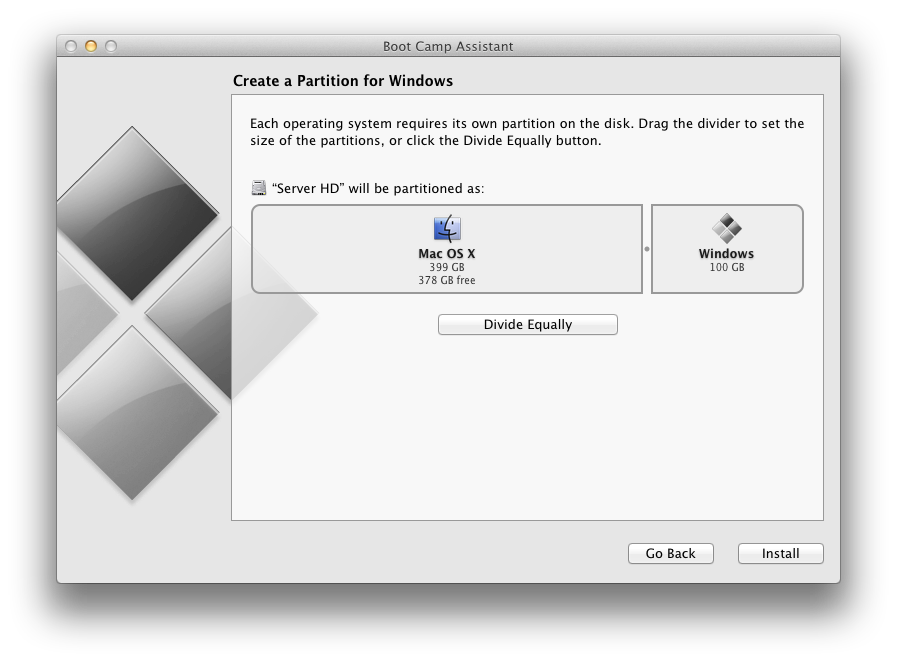
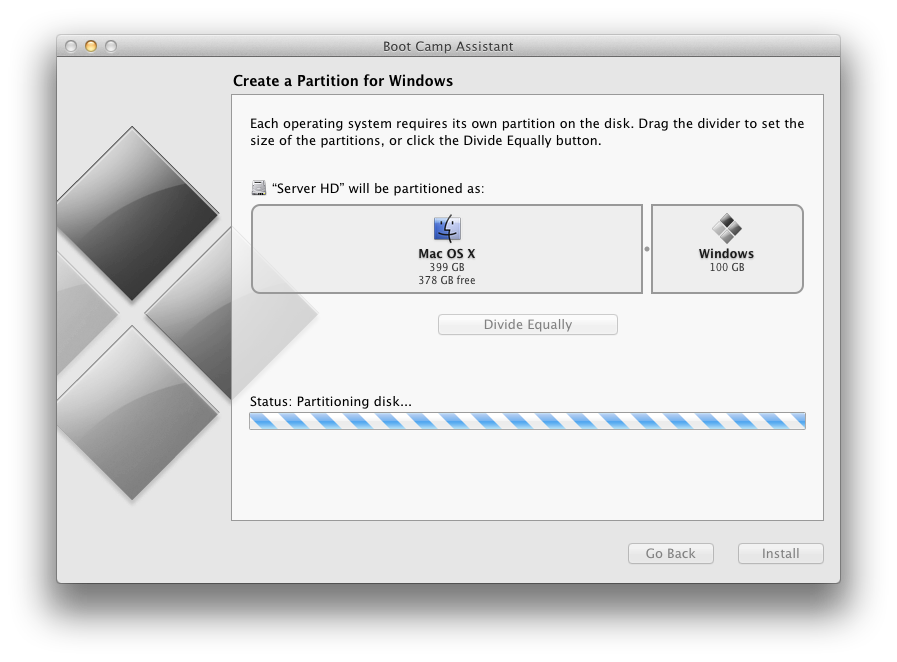
You will now be asked to Create a Partition for Windows. You can drag the divider to set the size of the partitions.
When satisfied with the size of your partition click the Install button.
Step Eleven
Boot Camp Assistant will now partition your disk.
Step Twelve
Once the partition has been completed your computer will automatically be restarted and launch Windows setup from the USB flash drive.
Step Thirteen
Proceed through the Windows setup.
When asked whether to do a Upgrade or Custom (advanced) install, choose Custom (advanced).
When asked "Where do you want to install Windows?" select the partition labelled BOOTCAMP. Next click Drive Options then click Format. Click OK to confirm format and click Next to continue the installation.
Step Fourteen
Once installation has completed successfully, click the Windows Explorer tile.
Step Fifteen
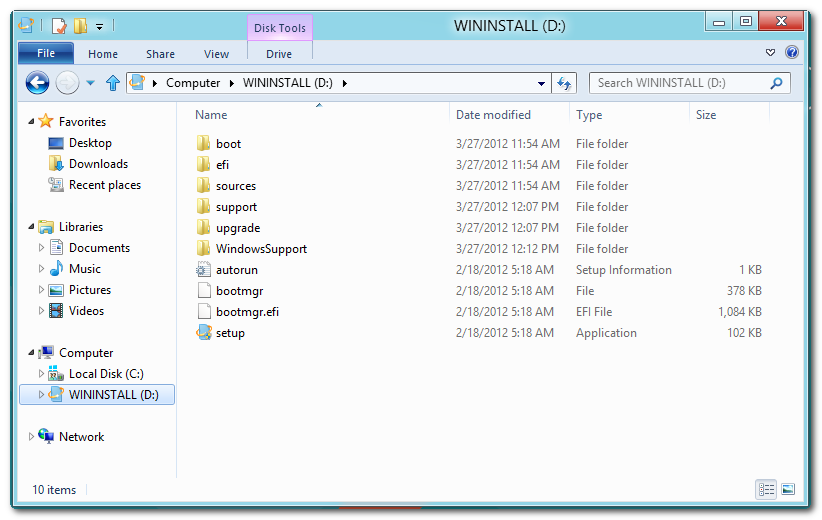
Select the WININSTALL USB flash drive from the list of devices under Computer and double click the WindowsSupport folder to open it.
Step Sixteen
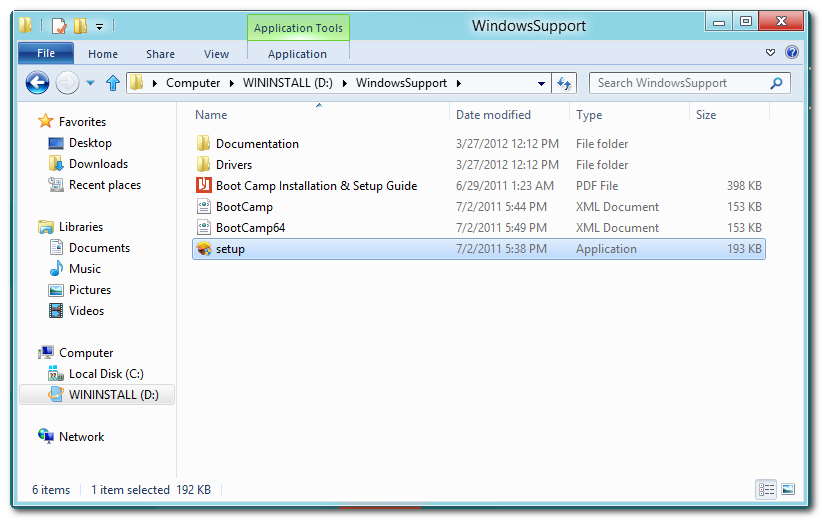
Double click setup to launch the executable.
Step Seventeen
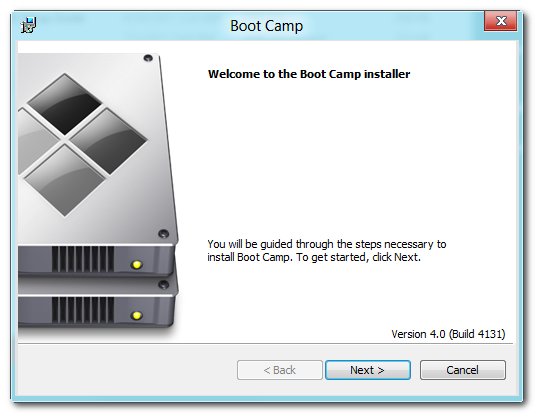
The Boot Camp Installer will appear to guide you through the steps necessary to install Boot Camp. Click the Next button to get started.
Step Eighteen
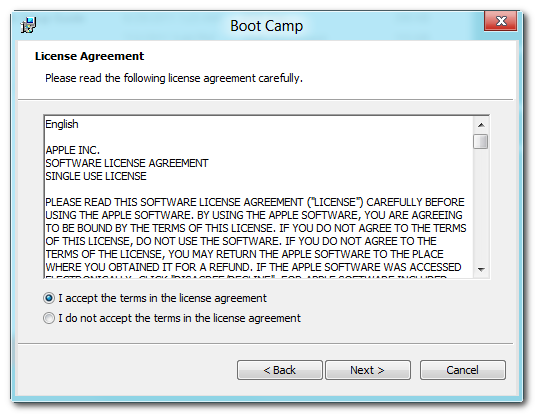
Read the license agreement, select I accept the terms in the license agreement, then click the Next button to continue.
Step Nineteen
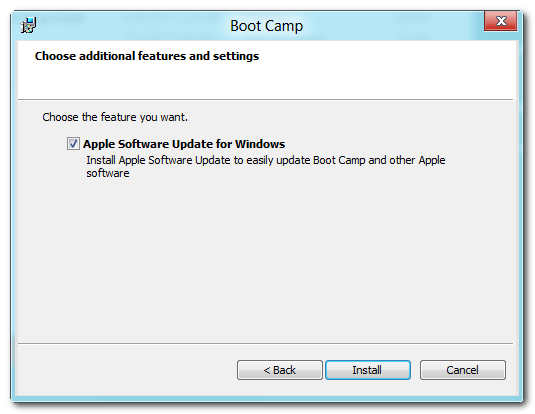
Choose whether you would like to install Apple Software Update for Windows then click the Install button.
Step Twenty
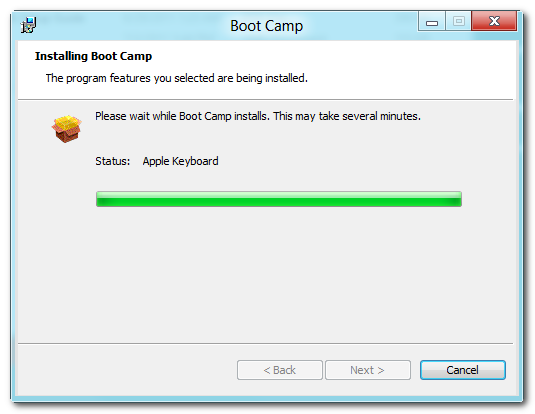
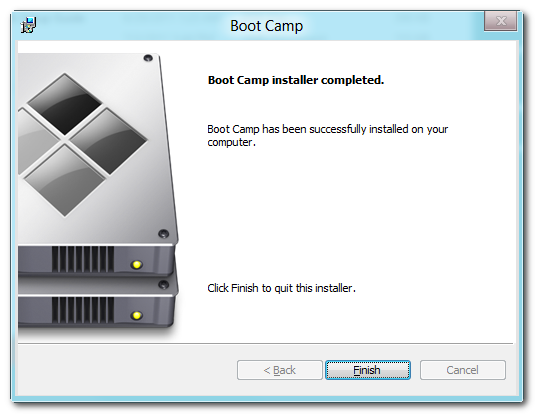
Boot Camp will proceed to install the drivers necessary for your Mac to work properly with Windows.
When the installation has completed click the Finish button.
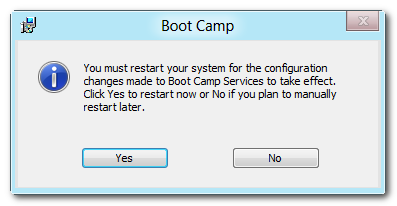
You will then be prompted to restart your system for the configuration changes to take effect. Click the Yes button.
Step Twenty One
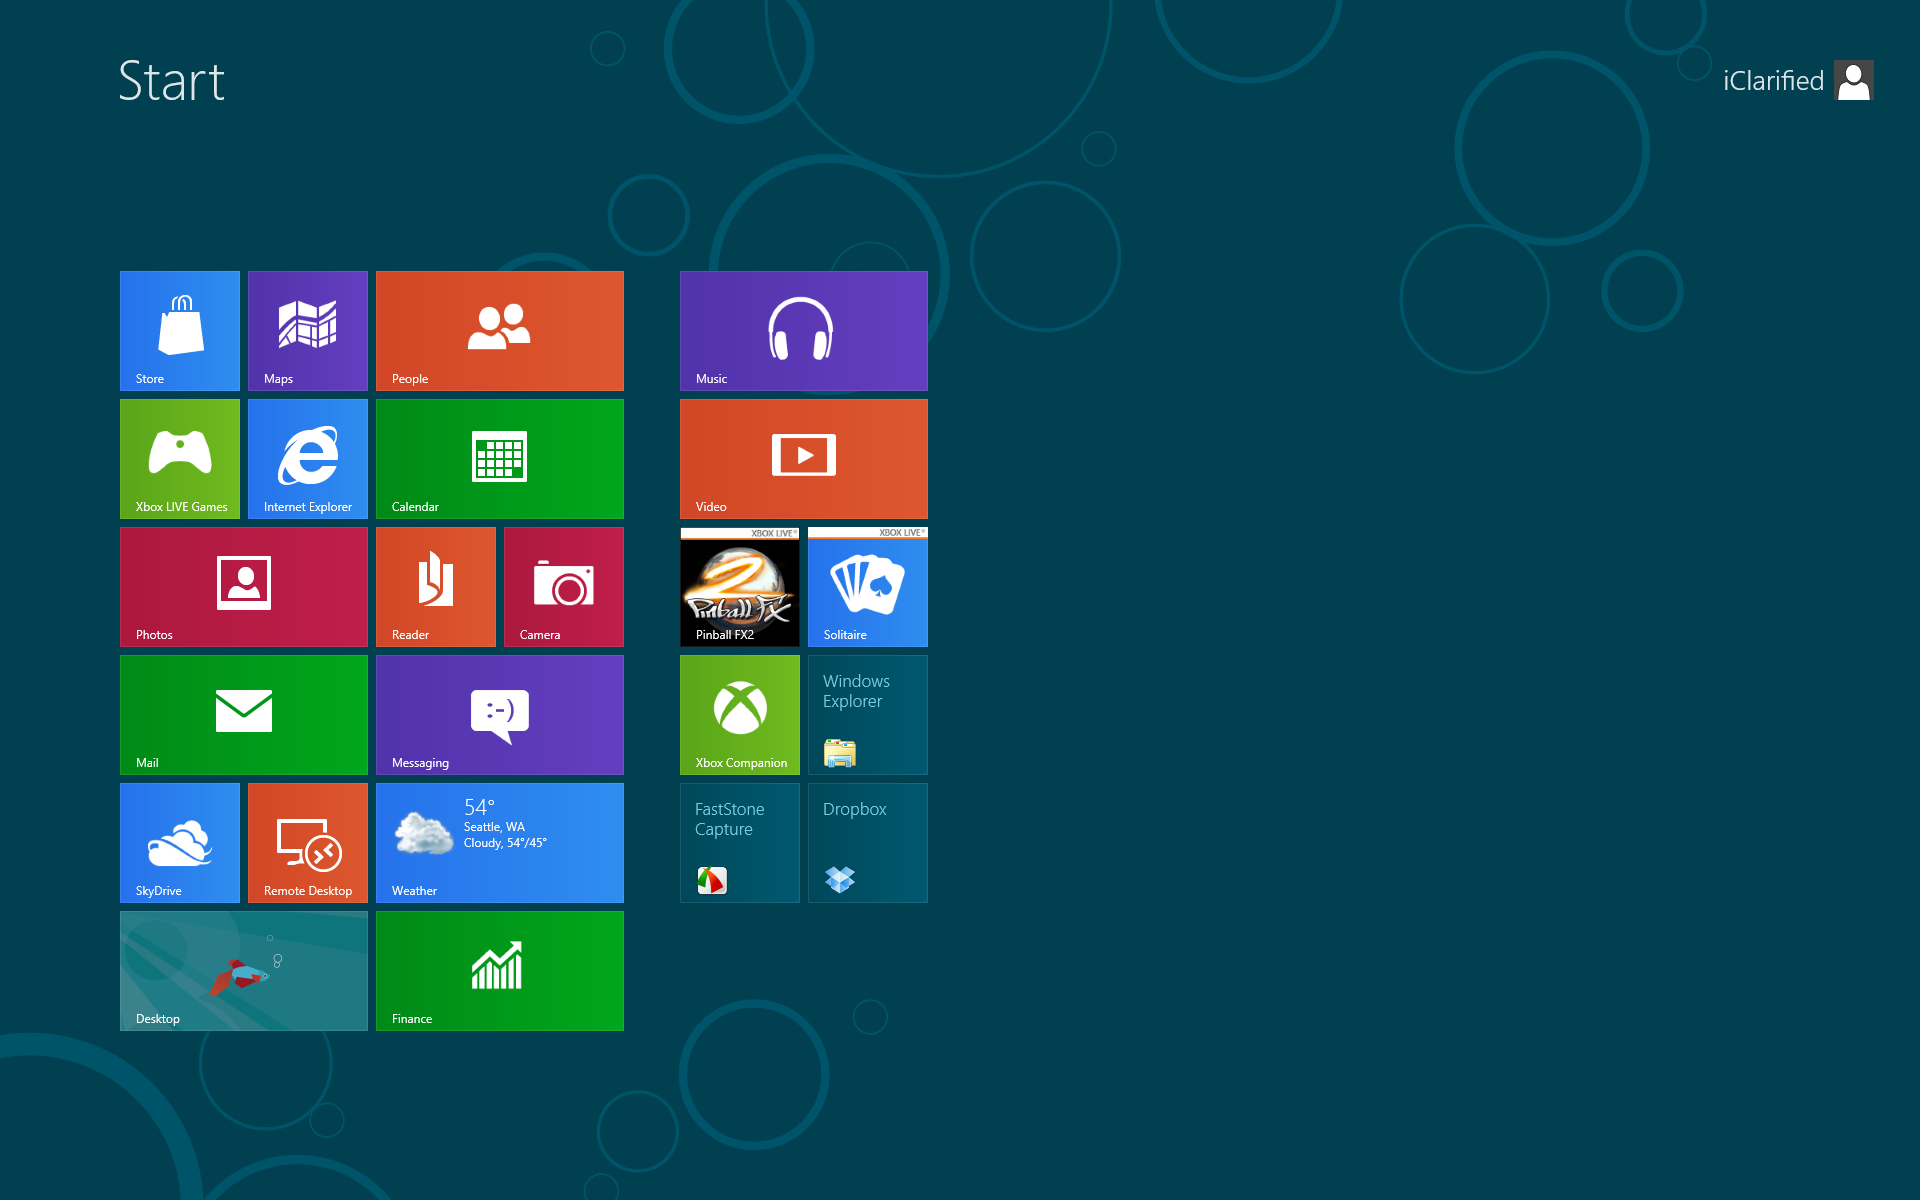
Once your system has restarted you will have successfully installed Windows 8 on your Mac using Boot Camp.

Subscribe to:
Posts (Atom)